
Map your feminine home office zone inside a tiny apartment
You do not have a separate home office room. You have an apartment – and somewhere inside it, a workspace is waiting to be defined. This guide treats that as a design problem with specific, practical answers.
The challenge is not finding the perfect desk or the right lamp. The challenge is choosing the exact zone and mapping it precisely before you spend a single dollar on furniture.
By the end of this section, you will know which room, which wall and which corner should hold your office zone in a small apartment, and what proportions it needs to work ergonomically and look good on camera.
Step 1: Understand your apartment like a designer
Before you move anything, stop thinking about your apartment as a collection of rooms and start thinking about it as a floor plan. That shift is what separates a workspace that genuinely works from one that slowly breaks down over three months.
Look at your apartment as a floor plan, not just rooms
A designer sees rectangles, circulation paths and light sources – not just a bedroom and a living room. That is the mental model you borrow for your home office.
A functional office zone is made of three elements working together:
- A wall to face – your visual anchor holding your monitor, shelves or artwork.
- A clearance zone behind your chair – at least 80–100 cm of usable space so you can move comfortably and sit well on video calls.
- A camera background – the slice of wall or room that appears behind you on calls and that you can style with intention.
These three elements must coexist in the same zone. If you only solve for one of them, you will be rearranging the entire room again in a few months.
Where your work actually happens today
Before you design anything, ask where you naturally open your laptop now. For most people it is the sofa, the bed or the dining table. That is not laziness – it is data about where the light, noise level and comfort are already workable.
Your chosen office zone should reflect that reality, not fight it. If you currently focus best at the kitchen table because of morning light, a bedroom desk that never sees daylight before noon will feel like a punishment, not an upgrade.
Constraints in small apartments
Every small apartment has fixed constraints that cannot be wished away. Mapping them now prevents expensive mistakes later.
Physical constraints to map:
- Radiators and at least 30 cm clearance in front.
- Windows – where natural light enters and at what angle.
- Doors and wardrobe fronts with their full swing radius.
- Power sockets and their positions on each wall.
- Balcony or storage access that must stay clear.
Human constraints to consider:
- A partner or roommate also working from home – their calls, movement and schedule.
- Pets that move through the space during the day.
- Whether you need to close a door for focus or privacy on calls.
- Noise from neighbours or the street that concentrates in one room more than another.
Apartment audit checklist:
- I have measured the width and depth of each potential zone wall.
- I know which direction my windows face (north, south, east, west).
- I know which doors must open freely and in which direction.
- I know where sockets are on each candidate wall.
- I have identified one or two spots where I already work naturally.
- I have noted any heat sources, columns or obstacles near candidate walls.
Step 2: Choose the best room for your office zone
In most small apartments there are three real candidates: the bedroom, the living room and the hallway or a niche. Each has its own logic. The right choice depends on your reality, not on the most photogenic Pinterest image.
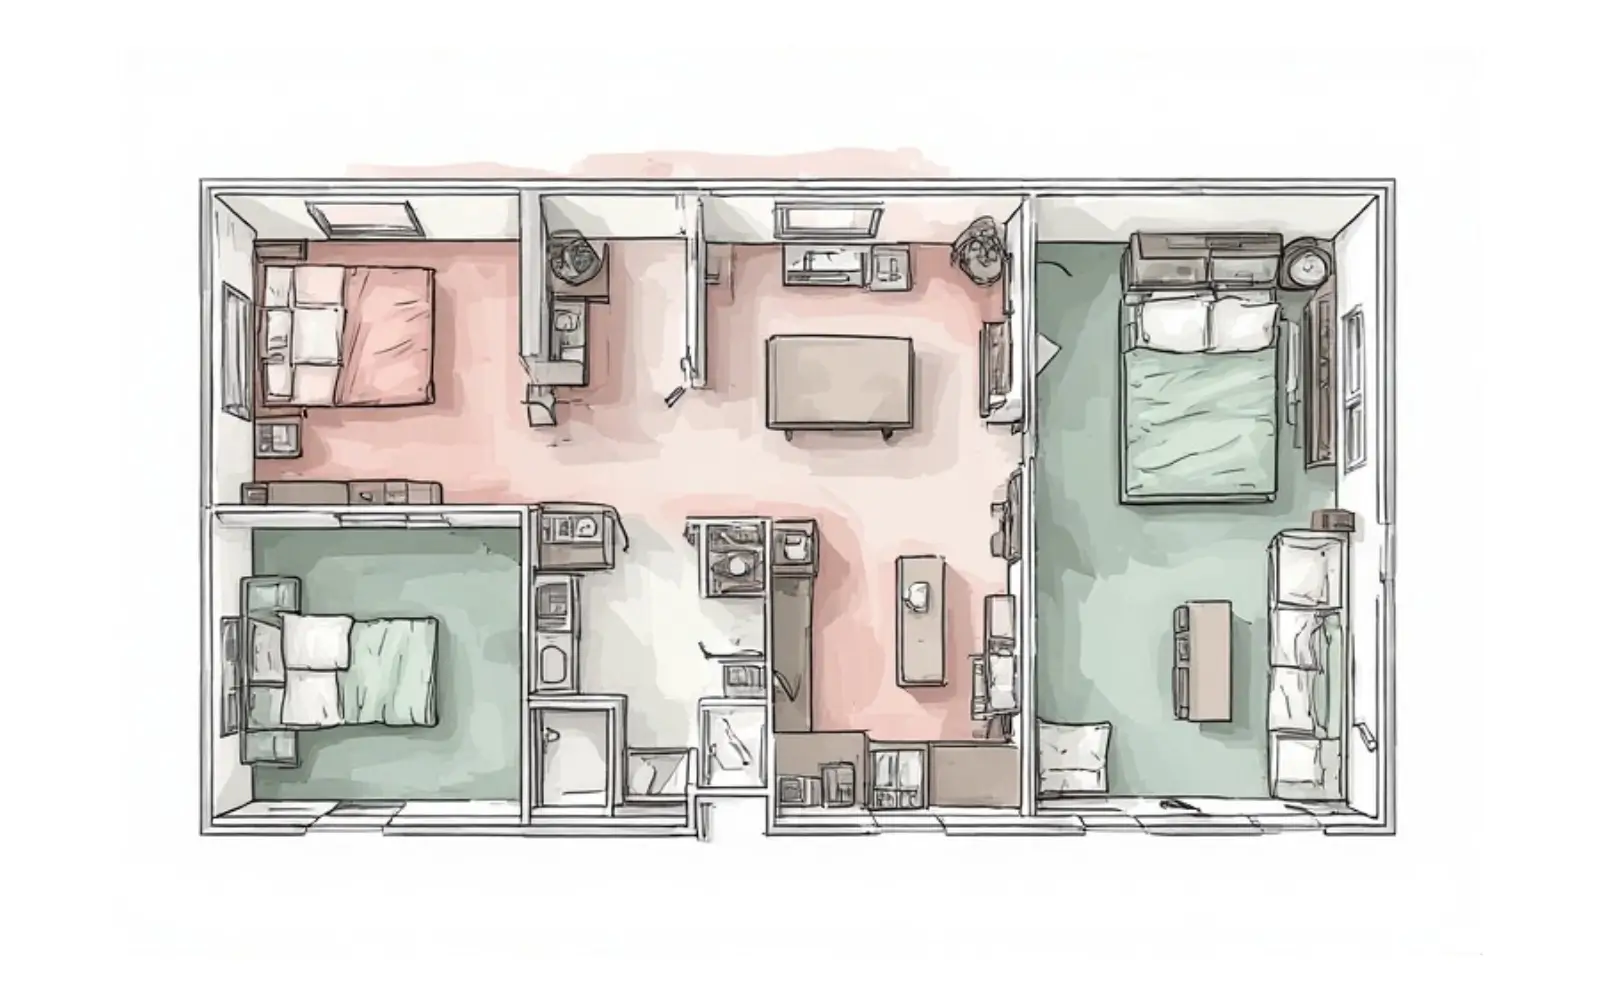
APARTMENT ZONES
A small apartment floor plan showing bedroom, living room and hallway office options so you can see all three zones at a glance before choosing one.
When a bedroom office makes sense
The bedroom is the most commonly chosen zone and for good reason. It offers the one thing most other rooms cannot guarantee: a door that closes.
Advantages of a bedroom office:
- Privacy during calls – you can shut out noise and pets.
- Easier to control and style the camera background.
- Often quieter acoustically than the living room.
- Feels more dedicated even in a shared apartment.
Disadvantages to plan around:
- Risk of work bleeding into sleep if you can see the desk from the bed.
- Limited floor space, especially in bedrooms under 10–11 m².
- Wardrobe access that must stay clear – the most commonly blocked clearance in bedroom offices.
This room is right for you if:
- You take frequent video calls and need a controlled background.
- You share your apartment and need acoustic separation.
- Your bedroom has at least 100 cm of uninterrupted wall width.
- Your living room is too small, too social or too shared to hold a desk.
When a living room office is the best option
The living room is usually the largest and brightest room in a small apartment. Used strategically, it can hold a workspace that disappears in the evenings.
Advantages of a living room office:
- More natural light throughout the day.
- More floor area and better ergonomic clearances.
- Easier to separate zones visually with furniture placement.
- Less risk of the work–sleep boundary problem you get in bedrooms.
Disadvantages to plan around:
- The workspace is visible to guests at all times.
- Background management is harder – more objects and visual noise.
- Activity from other people can interrupt focus more easily.
- The zone can creep and expand if it is not clearly defined.
This room is right for you if:
- You live alone or your partner is rarely home in work hours.
- You work in focused blocks rather than scattered minutes.
- Your bedroom is under 10 m² and cannot hold a desk ergonomically.
- You value natural light over maximum privacy.
The underrated option: hallway, niche or alcove
Hallways and niches are almost always overlooked. In many apartments, a recess or alcove is wide enough to hold a narrow desk and create a genuine office zone.
Advantages of a hallway or niche office:
- Naturally separated from both living and sleeping areas.
- Uses under-valued space that costs nothing to repurpose.
- Easy to style as a compact, intentional zone with minimal furniture.
- Keeps work physically contained and easy to visually close off.
Disadvantages to plan around:
- Depth is often limited to 35–45 cm.
- Circulation traffic passes through – not ideal for constant calls.
- Lighting is usually poor and must be added deliberately.
- Not suited to dual-monitor or large equipment setups.
This room is right for you if:
- Your bedroom and living room are both too small or too shared.
- Your hallway has a recess at least 90 cm wide and 45 cm deep.
- You mostly do focused solo work rather than call-heavy work.
- You want to keep both bedroom and living room free of work energy.
Step 3: Bedroom office layouts that actually work
The bedroom is the most common canvas for a small-apartment office. It deserves more than a random desk pushed into a spare corner. These three layout patterns are proportioned for rooms between roughly 9 and 14 m².
Layout 1: Desk beside the window
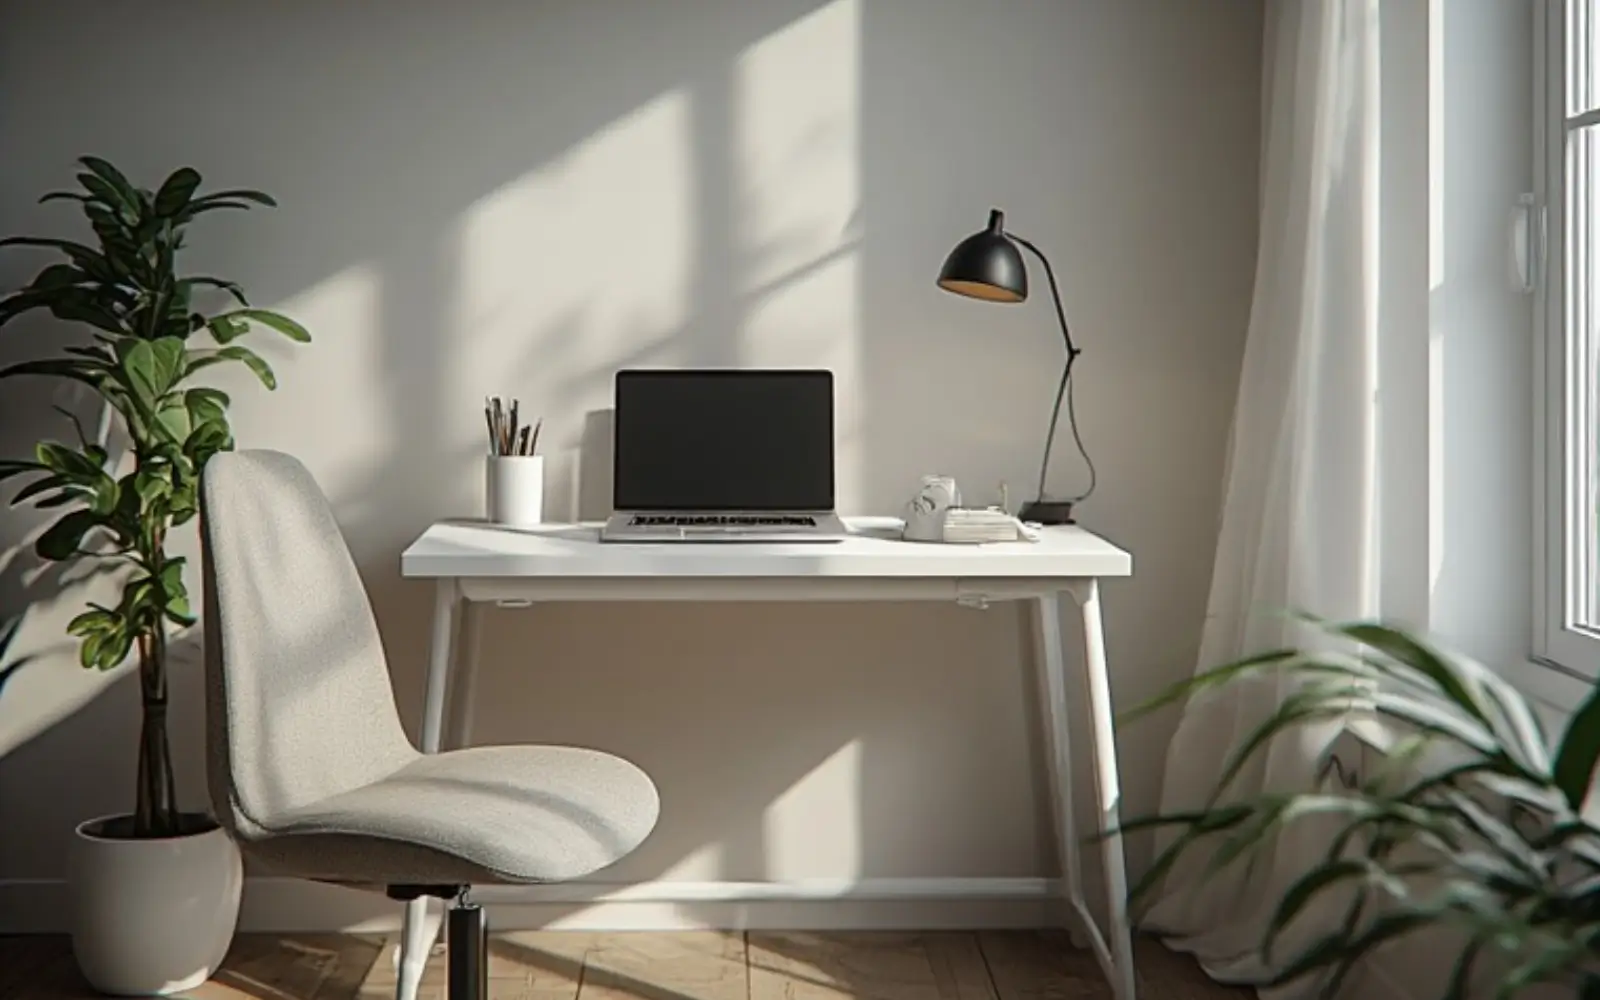
Position the desk so the window sits to your left or right – never directly in front of you, and never directly behind you. Light from the side illuminates your face evenly on calls and reduces screen glare. A window behind you creates a silhouette. A window directly in front makes the monitor hard to read.
Recommended dimensions:
- Desk width: 100–120 cm.
- Desk depth: 45–55 cm.
- Chair clearance behind: minimum 80 cm, ideally 100 cm.
In this layout the camera tends to face into the room. Choose a side or background wall you can style simply with one piece of art, a small shelf or a textured treatment.
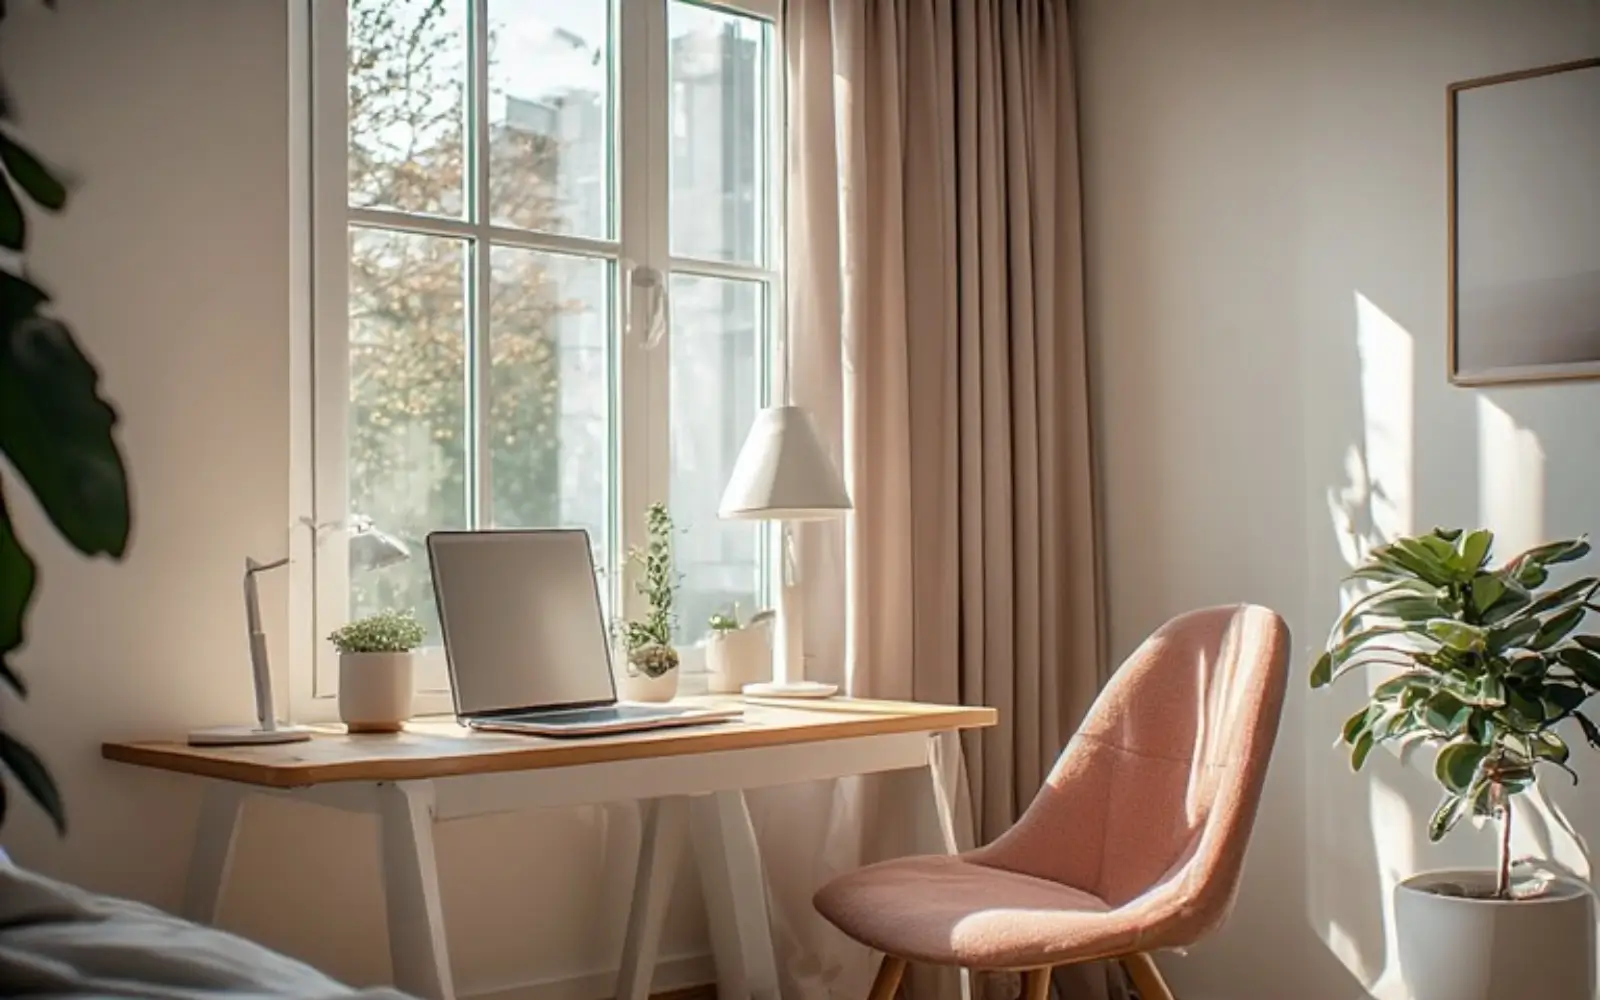
BEDROOM DESK BY WINDOW
A compact bedroom layout with the desk placed beside the window so light falls from the side and the room still feels calm and airy.
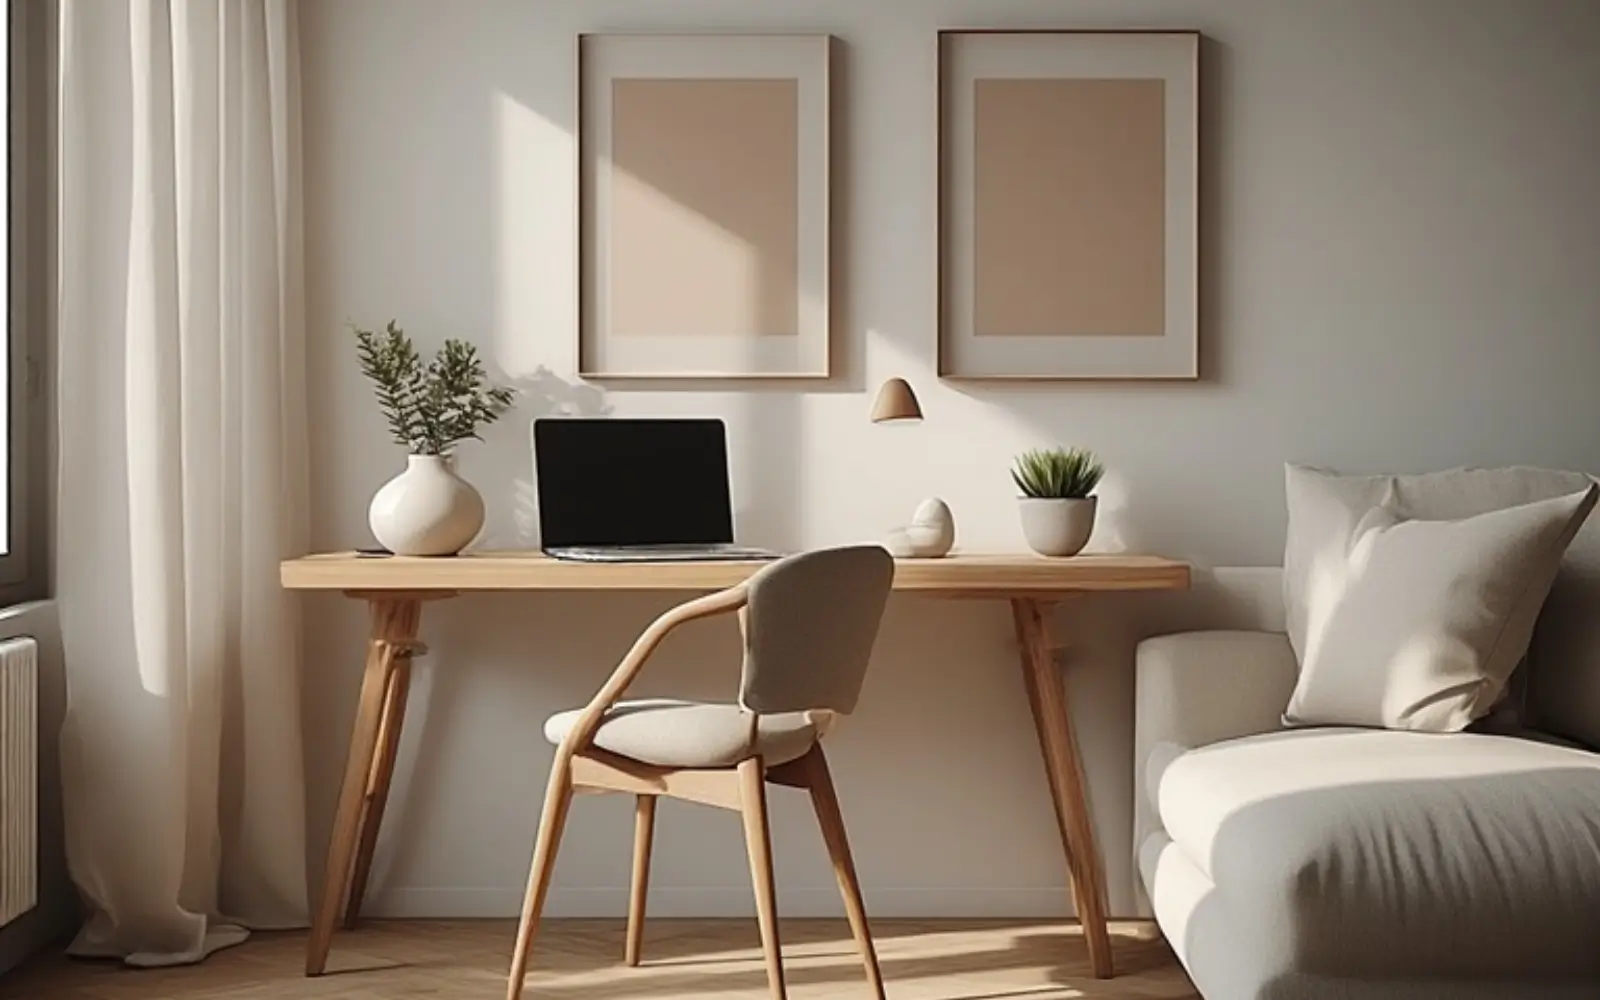
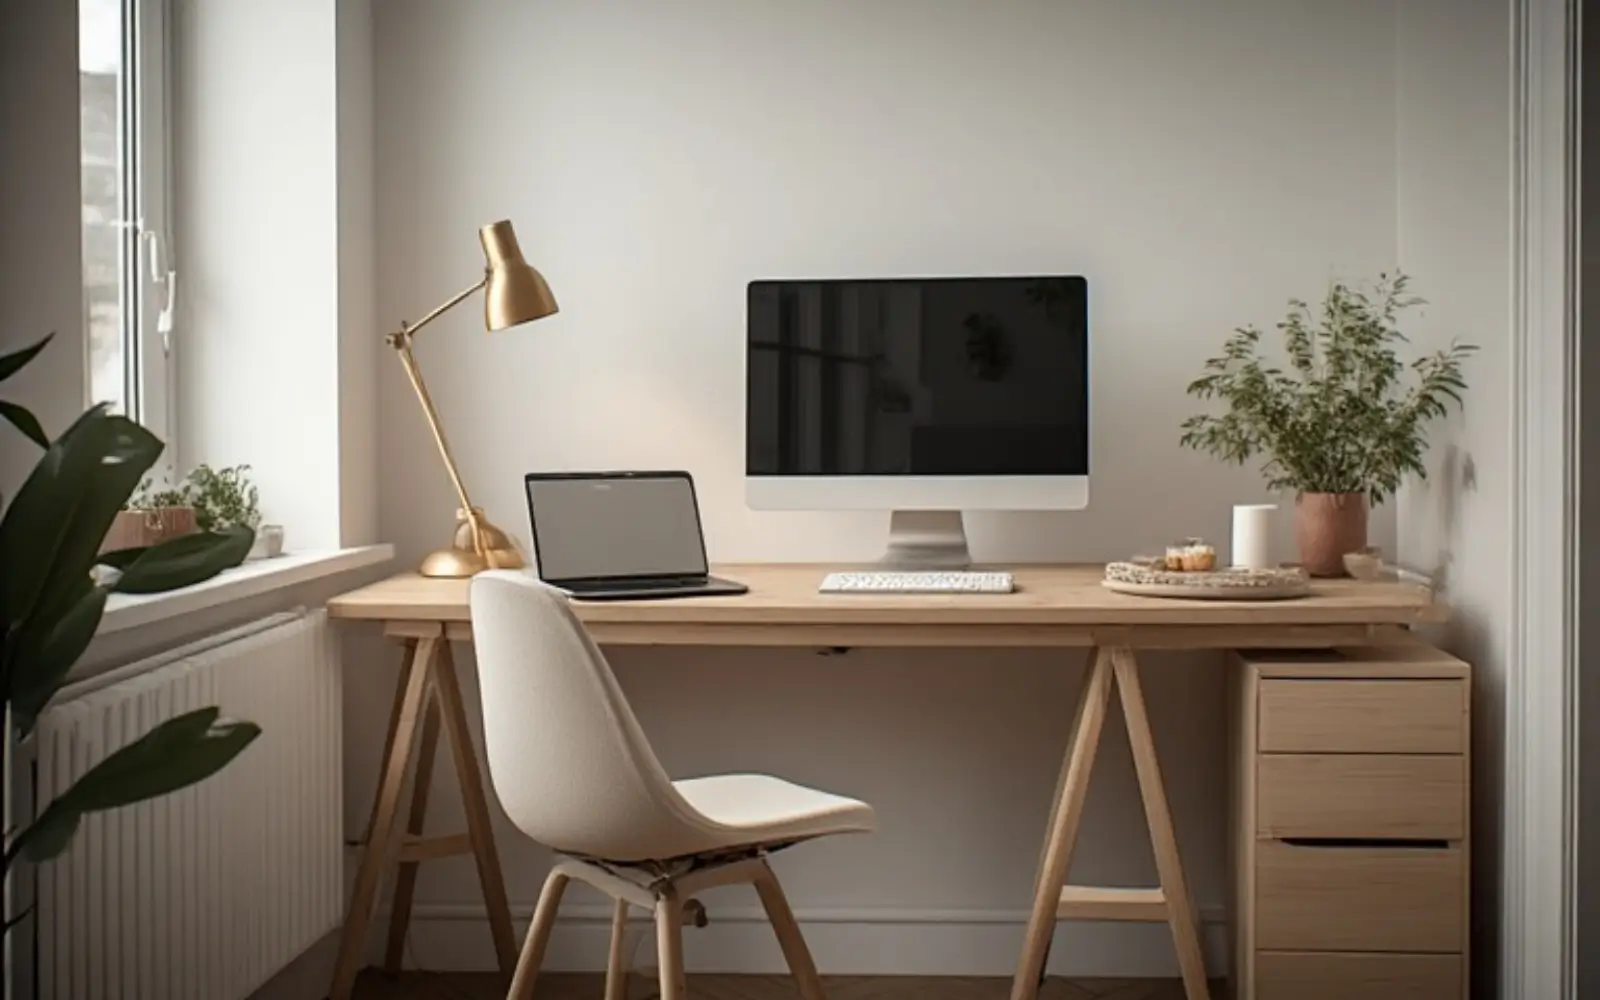
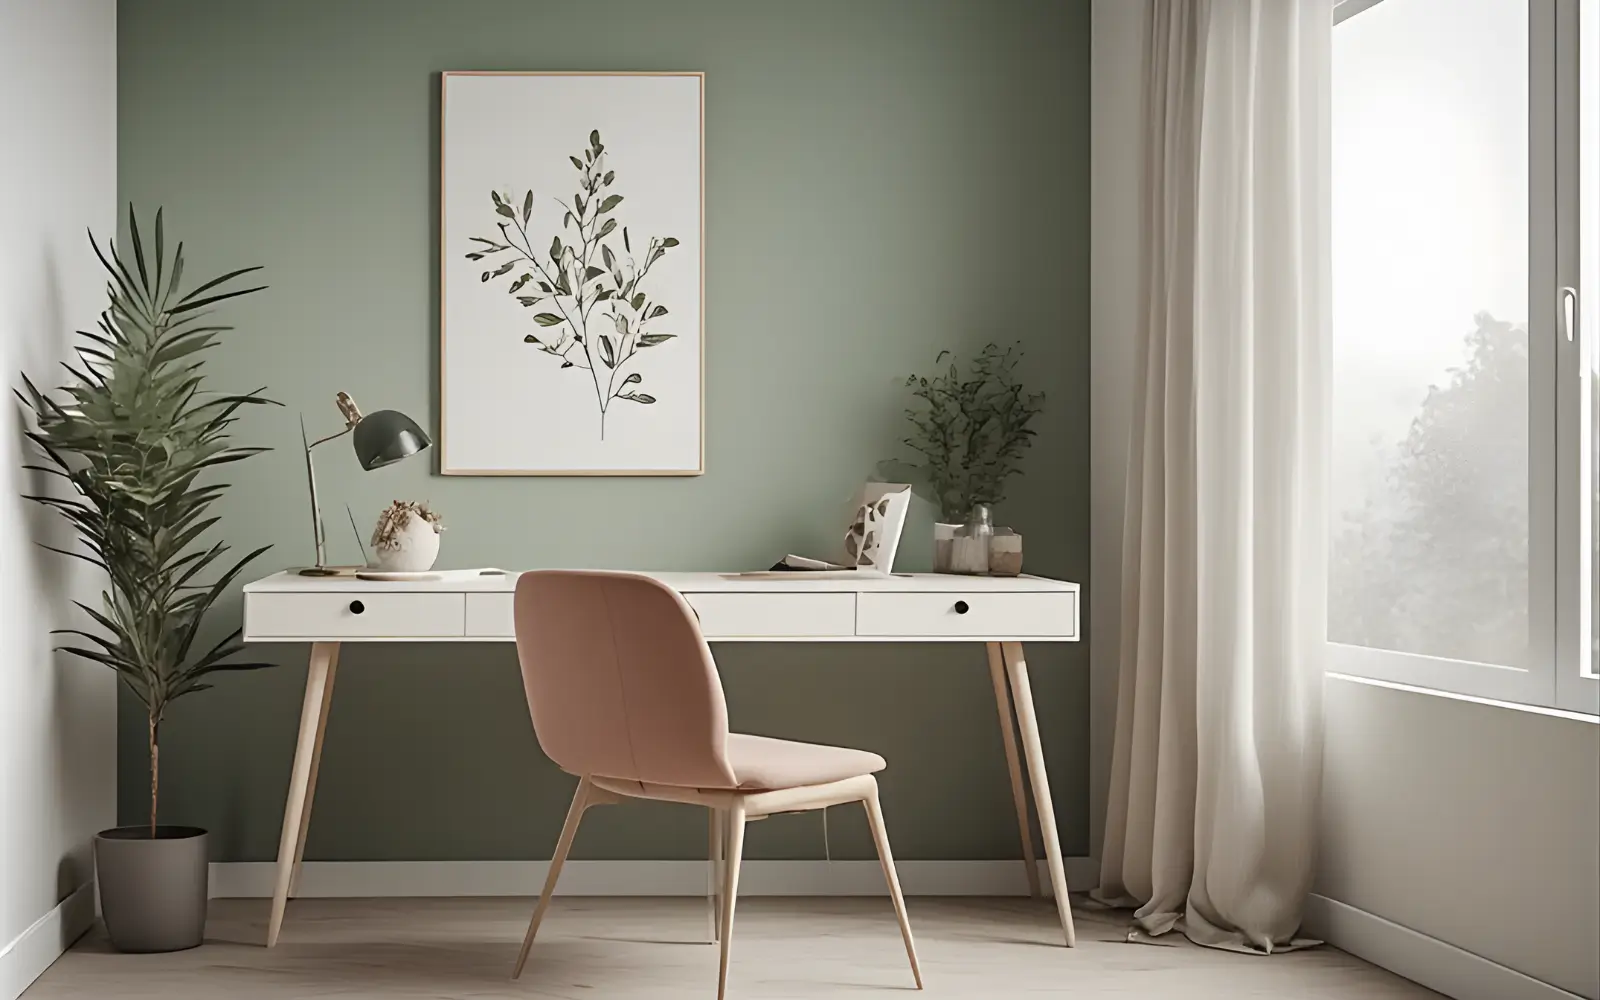
Layout 2: Desk opposite the bed with a styled background wall
When a window-adjacent wall is blocked by a wardrobe or radiator, placing the desk on the wall opposite the bed is the next best option. The wall behind you when you sit becomes your permanent video background.
Style that background with two or three framed prints, a single large artwork or a slim shelf with a plant and one or two neutral objects. Avoid letting the bed, laundry rack or wardrobe door dominate the frame.
Recommended dimensions:
- Desk width: 90–110 cm.
- Desk depth: 45–55 cm.
- Distance from bed edge to back of chair: at least 60 cm, ideally 80 cm.
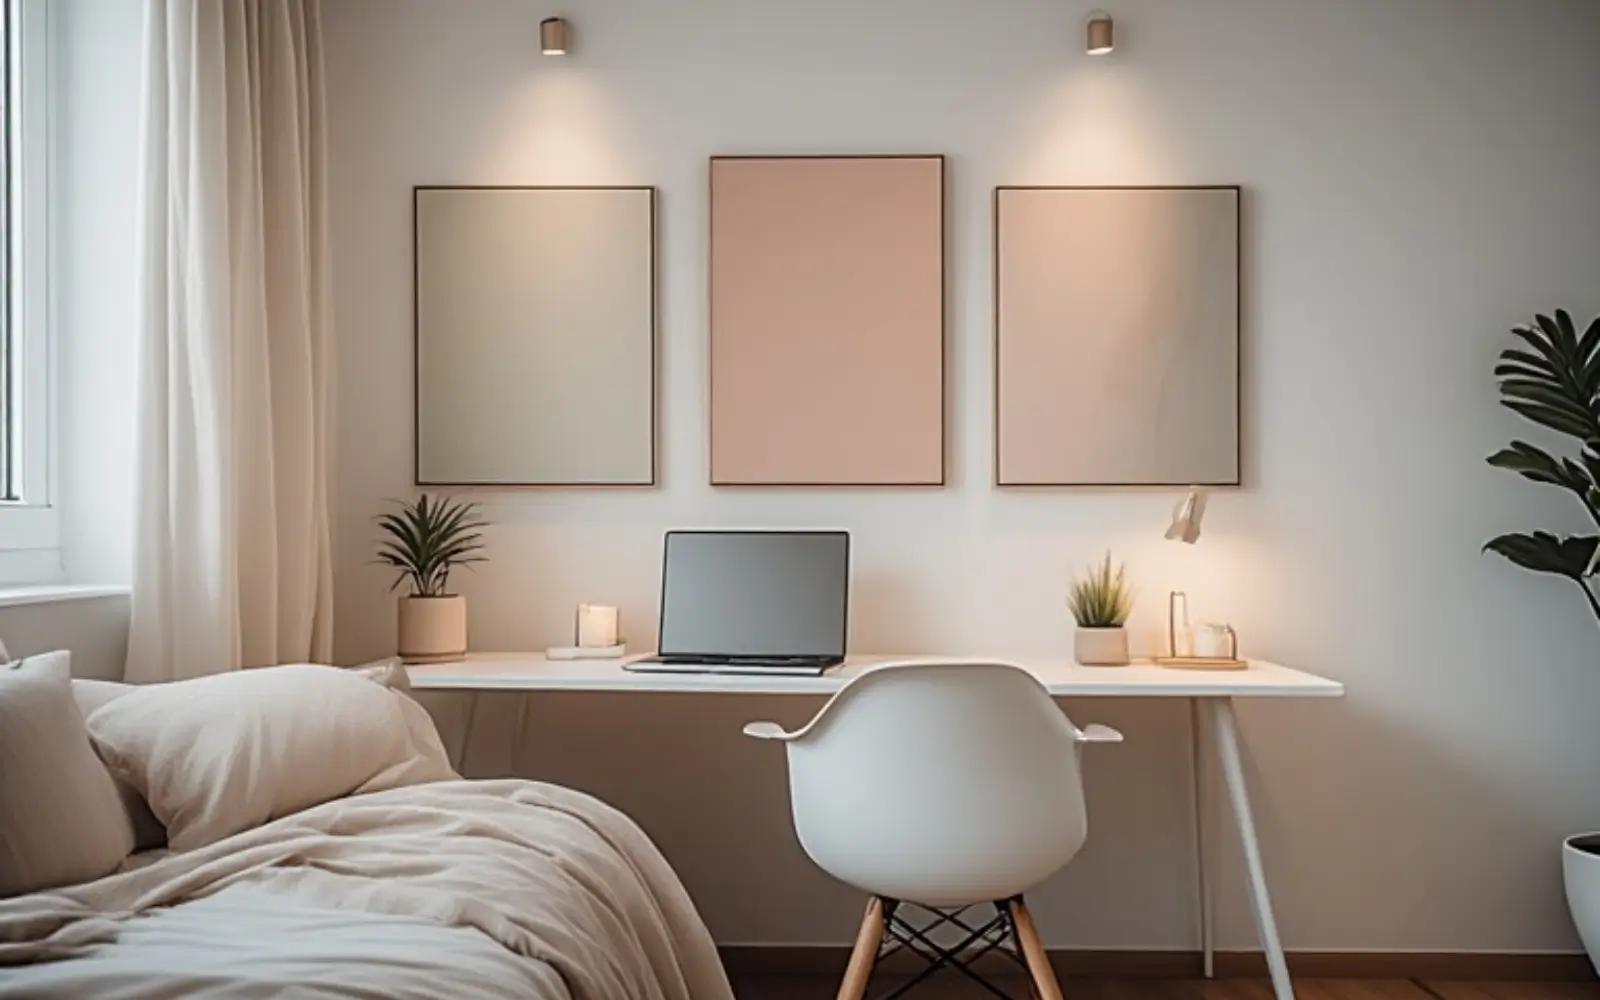
DESK OPPOSITE BED
A feminine bedroom office where the desk faces a styled background wall instead of the window or wardrobe.
Layout 3: Built-in look with dresser and desk hybrid
In very tight bedrooms, the most efficient solution is to align a narrow dresser and a desk along the same wall at the same depth. Together they read like a built-in unit rather than two separate pieces fighting for wall space.
Keep the dresser top styled in the same palette as the desk surface and use one vertical element like a pegboard or small shelf above the desk part to maintain rhythm.
Recommended dimensions:
- Combined wall width: around 150–200 cm.
- Desk section width: 80–90 cm.
- Desk depth: ideally matching the dresser at 40–50 cm.
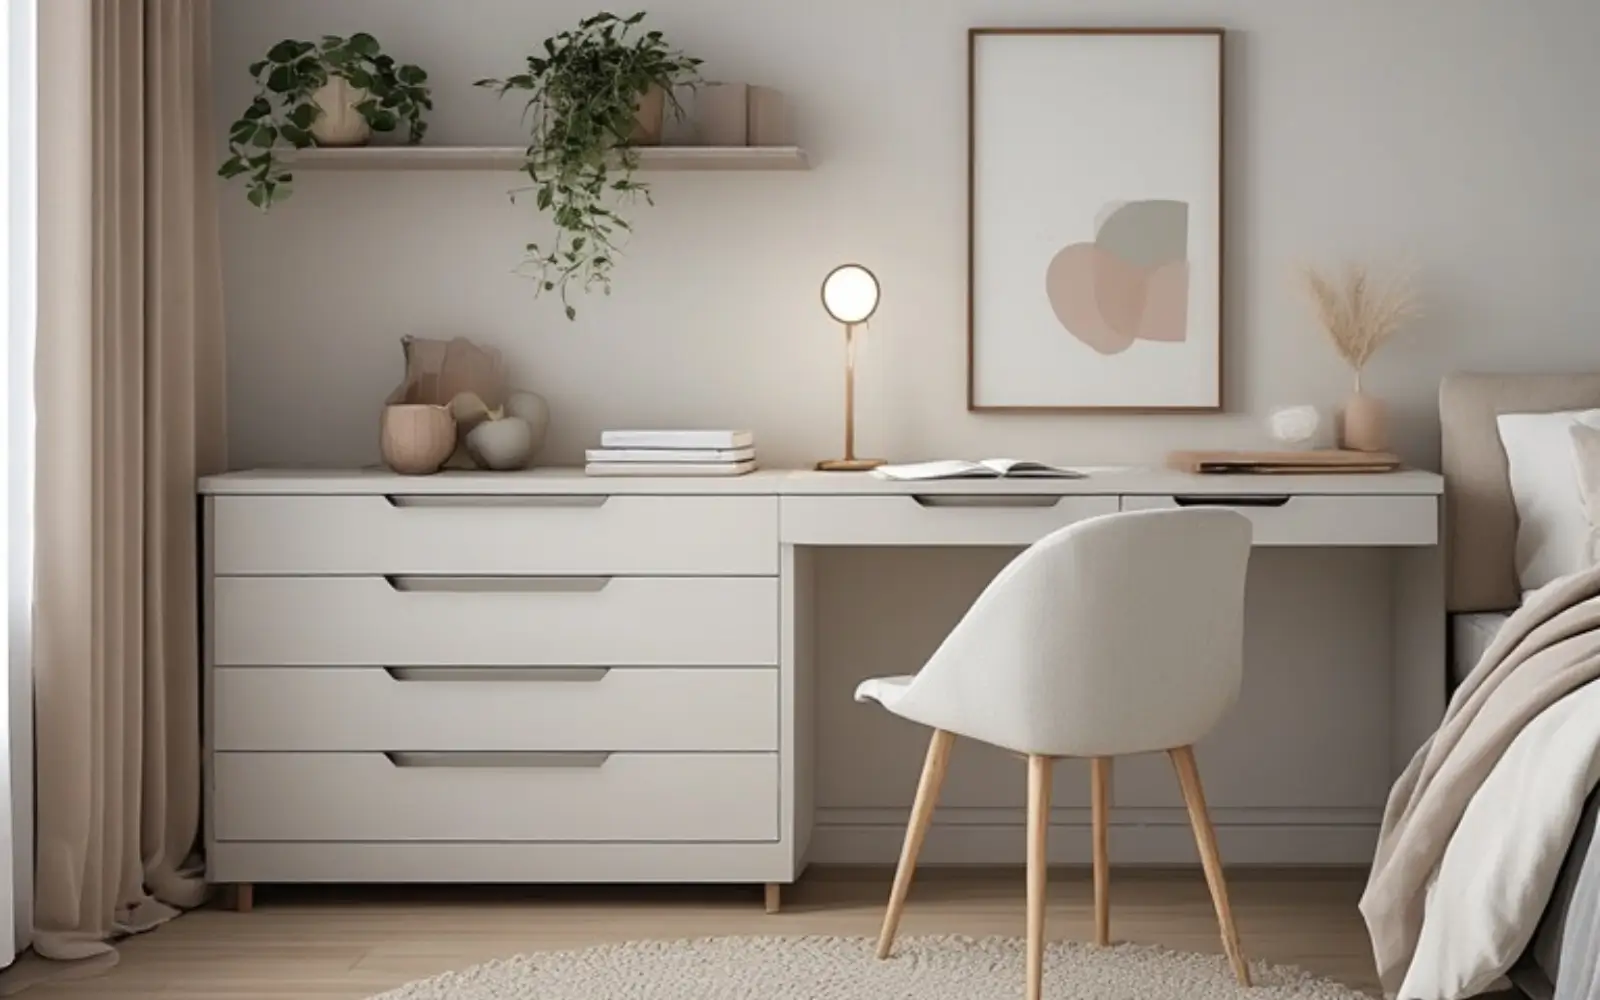
BUILT-IN BEDROOM LINE
A dresser and desk aligned along one wall so the bedroom office reads like a single built-in unit.
Step 4: Living room office zones that do not take over the room
The risk with a living room office is not that it will fail, but that it will slowly take over. Without clear boundaries, papers migrate to the coffee table and cables snake across the floor. These three layouts keep the zone contained and intentional.
Layout 1: Console desk behind the sofa
A console-style desk directly behind the sofa is one of the most elegant ways to place an office in a small living room. The sofa acts as a soft divider between living and working zones.
Keep 20–30 cm between the sofa back and the front edge of the desk so you can move your chair in and out without pushing the sofa. Route cables down the back leg of the desk and along the baseboard so they disappear behind the sofa.
Design the surface to reset every evening: by night it should read as a console table with a lamp, plant and one object, not a workstation covered in tech.
DESK BEHIND SOFA
A console desk behind the sofa that works as a daytime office and resets to an elegant living room zone at night.
Layout 2: Desk along a window wall
If your living room has a long wall with windows, placing a desk beside – not under – the window lets you capture excellent natural light while keeping the centre of the room open.
When the TV is on the same wall or adjacent wall, leave at least 80–100 cm between the TV unit and the desk to keep it out of your camera background and maintain calm sightlines.
Ensure there is at least 80 cm of walking space between the front of the desk and the nearest opposing furniture so the desk does not cut the room in half.
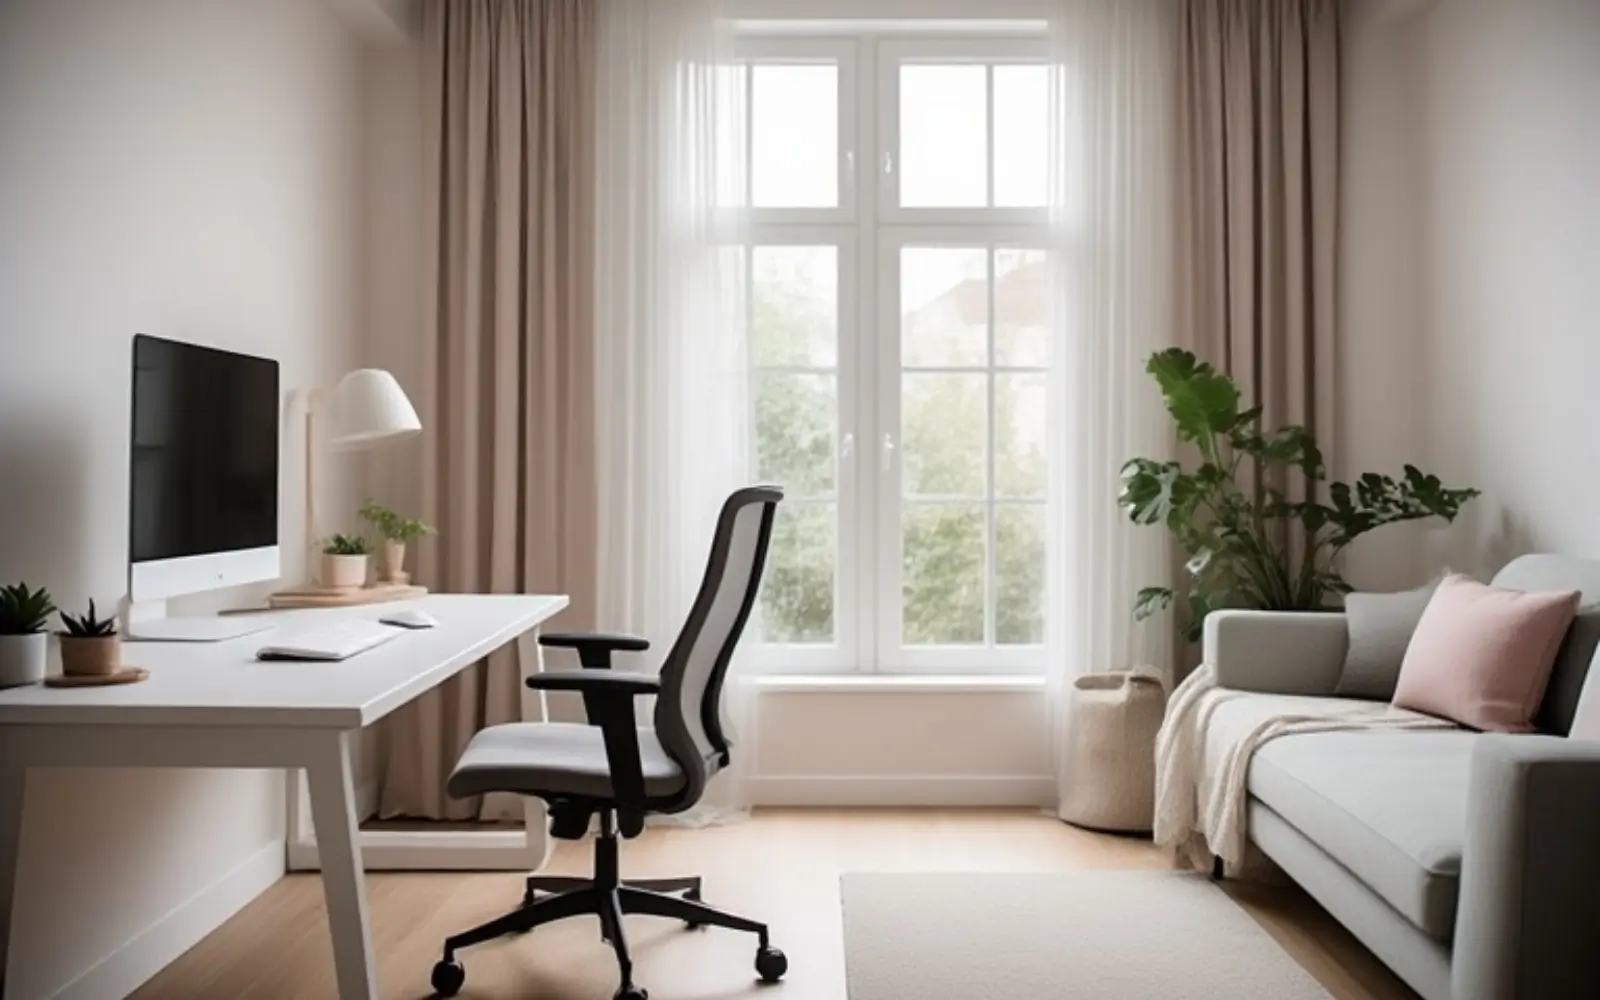
WINDOW WALL DESK
A slim desk along the living room window wall capturing soft natural light without slicing the room in half.
Layout 3: Office alcove in a corner
A corner or alcove can become a compact office that feels contained. An L-shaped configuration with a desk and a low shelf uses dead space efficiently while keeping the main floor area clear.
Anchor the zone with a small rug under the desk and chair and add a floor lamp or pendant above to give the alcove its own light source and identity.
Minimum corner dimensions:
- Each leg of the corner desk around 80 cm wide.
- Total corner area including chair clearance about 140×140 cm.
LIVING ROOM CORNER
An L-shaped desk and rug turning a forgotten corner into a self-contained living room office alcove.
Step 5: Hallway and niche offices that still feel elegant
A hallway office is a niche solution, but when the dimensions are right it creates one of the cleanest boundaries between work and the rest of your home.
What minimum dimensions make a hallway office possible
Not every hallway can hold a desk. The minimums are non‑negotiable if you want daily comfort and safety.
- Niche or wall width around 90 cm minimum (80 cm is an absolute floor and feels cramped).
- Depth of 45 cm for a wall-mounted desk or 50–55 cm for a freestanding one.
- Circulation path of at least 70 cm between the chair and the opposite wall when the chair is pulled out.
If your hallway offers around 100 cm width and 50 cm depth, you have a realistic office niche. If it is narrower than 80 cm, this solution is not going to be comfortable.
Wall-mounted versus freestanding desks
Wall-mounted desks suit hallway niches best because they keep the floor more open and can be positioned at the perfect height. Folding versions disappear almost entirely when not in use.
In strict rentals where drilling is not allowed, a narrow freestanding desk that can tuck its legs fully under the top when standing is a strong alternative.
Lighting and colour for narrow zones
Hallways often feel like storage corridors because they lack natural light. A compact articulated desk lamp at eye height plus a small wall sconce or picture light above the desk can transform the feeling of the niche.
A slightly warmer or more saturated wall colour in the niche – soft terracotta, warm stone, sage – helps the zone read as a designed space rather than a leftover corner.
Privacy and noise in hallway offices
Working in a hallway means accepting that household traffic will occasionally pass. For calls, position the camera so the styled niche wall, not the corridor to the kitchen or bathroom, sits behind you in frame.
Over‑ear headphones become essential for deep focus. The hallway gives you spatial separation, not perfect acoustic isolation.
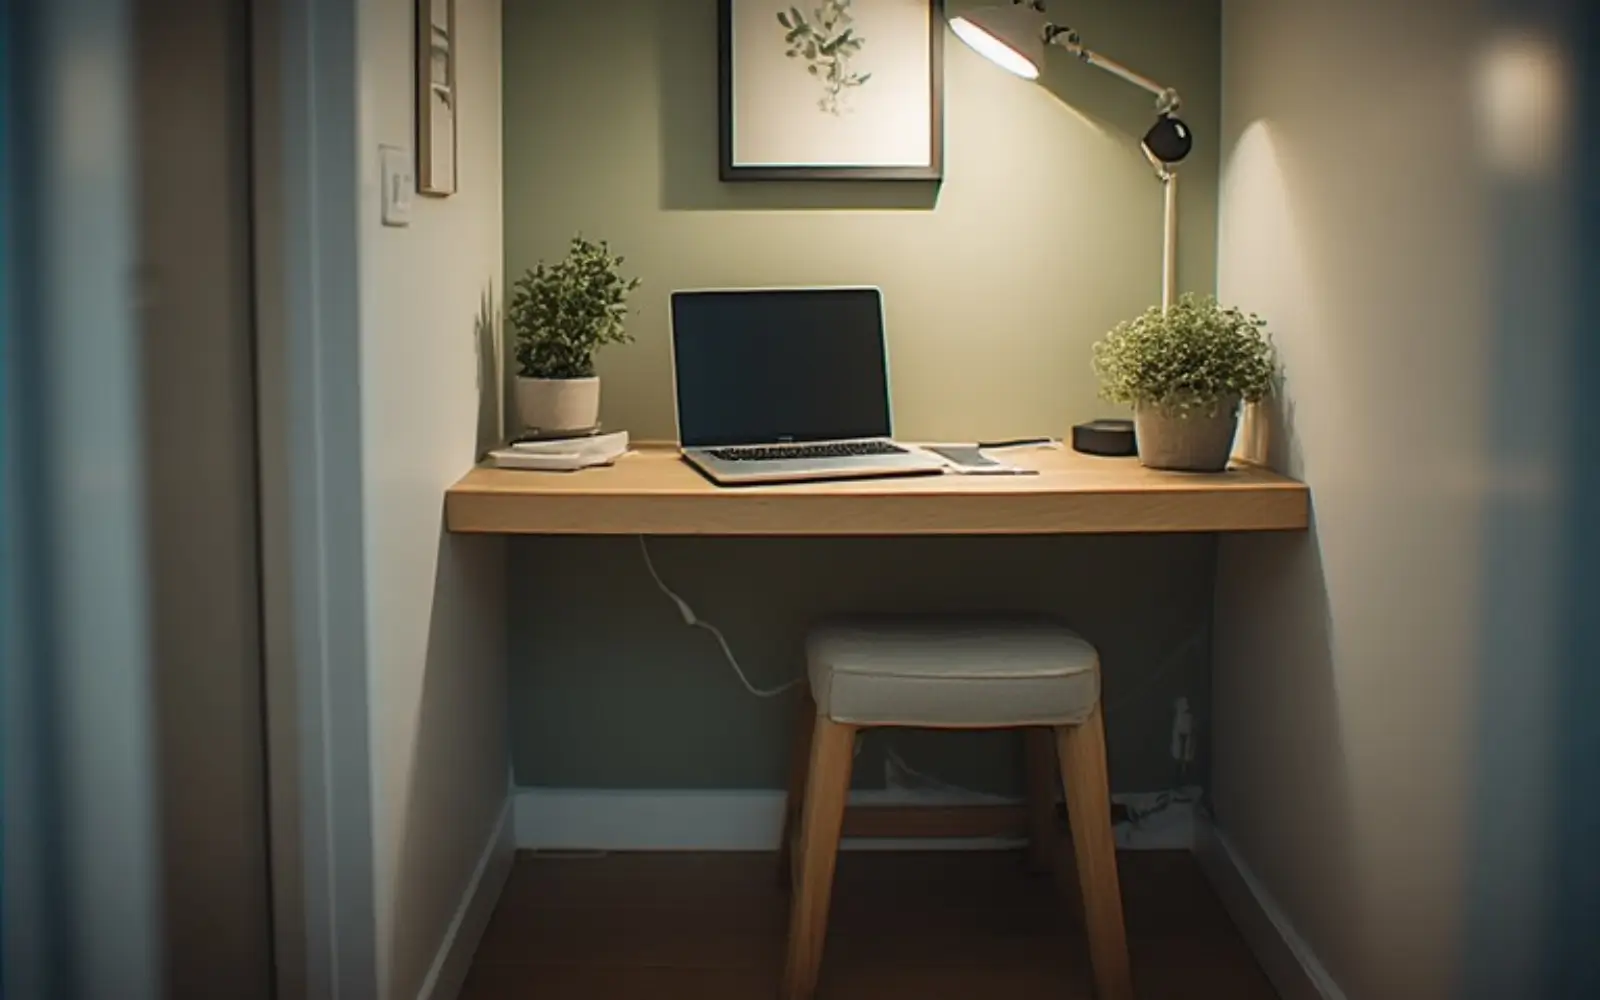
HALLWAY NICHE OFFICE
A wall-mounted desk and styled niche wall showing how a hallway recess can become a compact but elegant office.
Step 6: Map your personal office zone – a step-by-step exercise
This exercise takes ten minutes with a notebook and a tape measure and saves you weeks of frustration. Do it before you open a single furniture tab.
Step 1: Measure
For each candidate wall, record three numbers:
- Wall width – uninterrupted wall length where a desk fits.
- Available depth – distance from the wall to the nearest obstacle.
- Chair clearance – the space left after accounting for desk and chair depth.
These numbers are your spatial reality. Work with them, not against them.
Step 2: Draw a simple plan
Sketch each room as a rectangle on an A4 sheet. Mark doors, windows and fixed elements. Use a rough scale such as one centimetre on paper to twenty centimetres in real space. You are aiming for honesty, not architectural perfection.
Step 3: Place the desk and chair on paper first
Cut paper rectangles to represent your desk and chair at the same scale and slide them along each candidate wall on the drawing. Check whether doors still open and whether a real person could walk around the desk.
Step 4: Check sightlines and background
On your drawing, imagine your own view from the chair and the camera's view back toward the room. Note which walls, windows and objects fall into that 90‑degree cone behind you. That is your camera background zone.
Step 5: Check circulation
Trace the paths people walk through the room. Mark where doors open and where wardrobe or cupboard doors swing. Your desk and chair should not interrupt any of those paths.
Zone mapping checklist:
- I have measured wall width, depth and chair clearance for at least two candidate zones.
- I have drawn a rough floor plan and placed desk and chair to scale.
- I have identified a background wall with styling potential.
- I have confirmed all doors can open fully with the desk in place.
- I have at least 70–80 cm of circulation path around the zone.
- I have a power socket within roughly 1.5 m or a safe route for an extension lead.

OFFICE ZONE PLAN
A simple floor plan sketch with the chosen office zone highlighted, matching the mapping exercise you just completed.
Step 7: Common layout mistakes to avoid
These mistakes appear again and again in small-apartment offices. Each one is easier to prevent now than to fix after you have bought furniture.
- Placing your back directly to the only window and ending up in silhouette on camera.
- Choosing a desk deeper than about 60–65 cm in a small room and sacrificing circulation space.
- Blocking wardrobe or cupboard doors and turning every storage access into furniture Tetris.
- Letting the office zone slowly expand across the whole room because there is no clear physical boundary.
- Ignoring the camera background until after the desk is in place.
- Choosing a dark corner with no lighting plan and relying on the laptop screen as the only light.
- Putting the desk directly in the main path to the kitchen, bathroom or balcony.
- Buying a chair before confirming that you actually have 80 cm of clearance behind it.
Step 8: Quick layout recipes for real apartments
These recipes condense the guide into ready-made starting points. Find the scenario that looks most like your home and adapt the details.
Recipe 1: One-bedroom apartment with a small bedroom and long living room
Use the living room for your office. Place a console desk behind the sofa, style the wall behind the sofa as your background and keep a narrow drawer unit or caddy tucked behind the sofa arm for storage. The rule is that the desk surface resets to console‑table mode every evening.
Recipe 2: Studio apartment with one large window and a corner sofa
Place a shallow desk beside the large window on the same wall, leaving room for curtains and access. Style the short side wall as your background and keep storage vertical (shelves rather than floor units) so the zone does not eat into the studio's limited floor area.
Recipe 3: Narrow hallway with a niche
Create a wall‑mounted fold‑down desk in the recess, paint the niche wall one shade deeper than the hallway and add a small wall light. Keep storage off the floor and use the fold‑down mechanism as your daily reset ritual.
Recipe 4: Shared apartment with a partner also working from home
Give one person the bedroom and one the living room or hallway, with each space having its own background wall and storage. Agree on call schedules and reset rules so neither office zone bleeds into the shared social space.
Recipe 5: Studio under 35 m² with no obvious zone
Choose the wall furthest from the bed, even if it is only 90 cm wide, and install a very shallow desk. Make that wall your styled background and commit to a complete desk reset every evening so the studio can return to feeling like a home, not a permanent office.
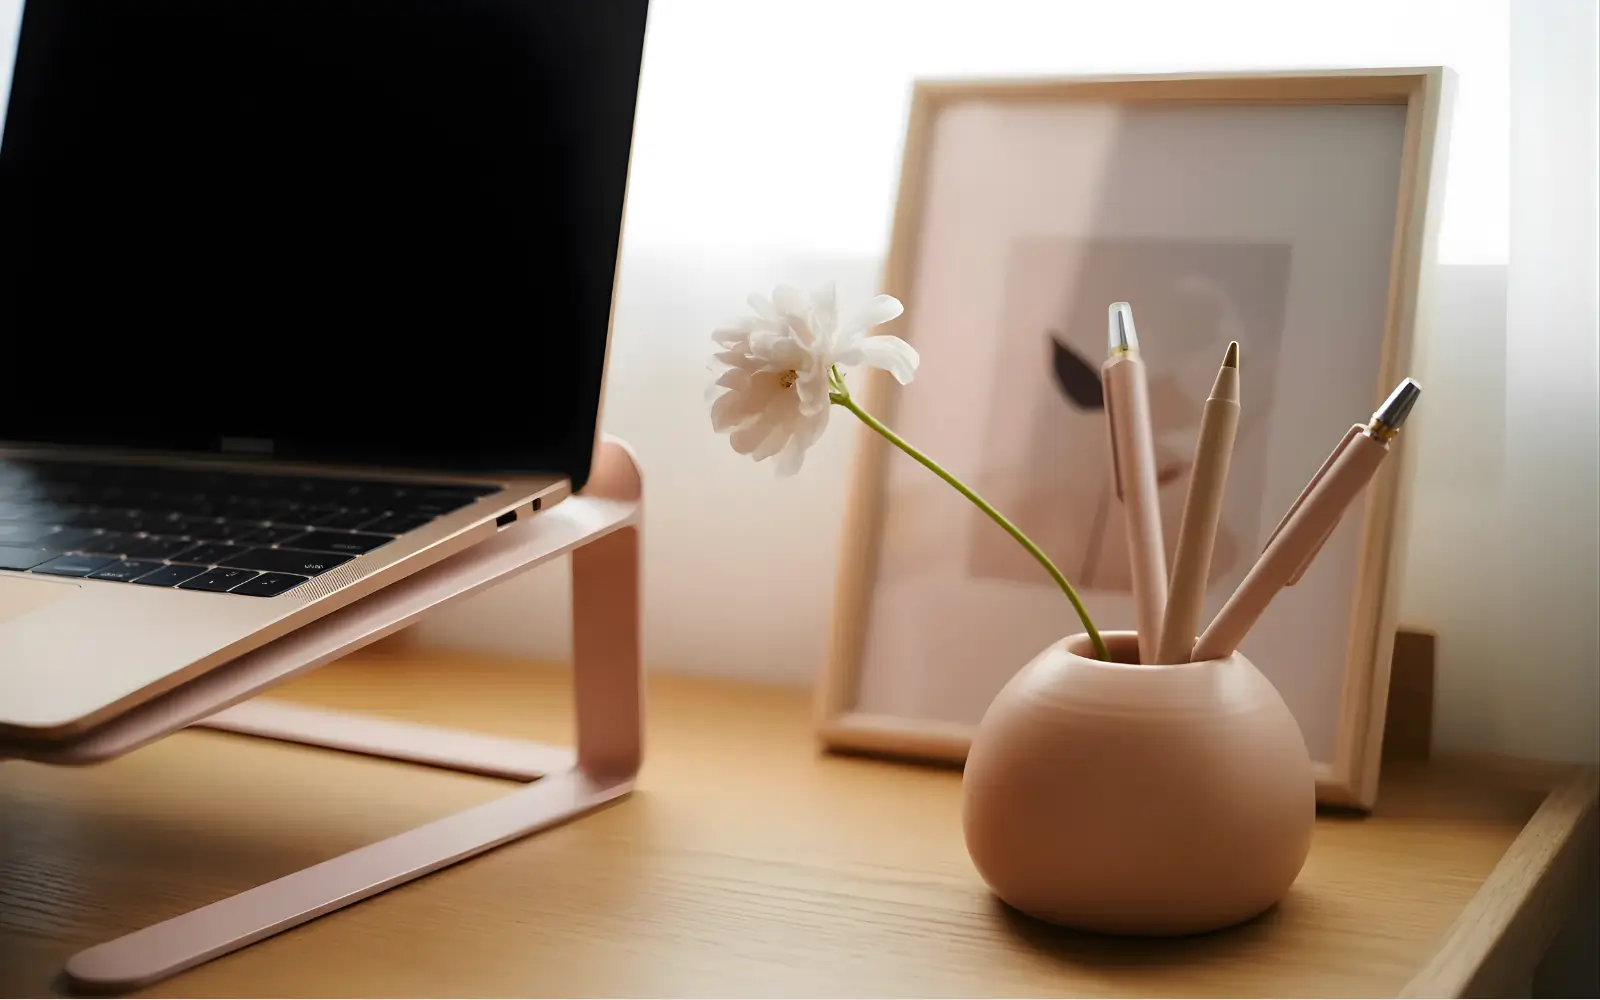
Feminine home office essentials for small apartments
If you have been working from your sofa for the past year, you already know what is wrong: your back aches by noon, your neck is stiff by three and every video call involves a frantic search for a neutral background. You are not failing at working from home – you are just missing the right tools.
This section is not about finding the perfect corner in your apartment. That question – where to carve out your workspace – is answered in the layout and zone guide in the first part of this hub. And this is not a mood board full of unrealistic styling shots. This is the practical, component-by-component answer to what exactly you need, how to choose it for a small space and how to make it feel unmistakably feminine without sacrificing comfort.
By the time you finish reading, you will know every category of essential – desk, chair, screens and stands, lighting, near-desk storage and desktop accessories – along with specific dimensions, ergonomic rules and honest budget guidance. You will also know exactly what to buy first if you can only do one thing this month.
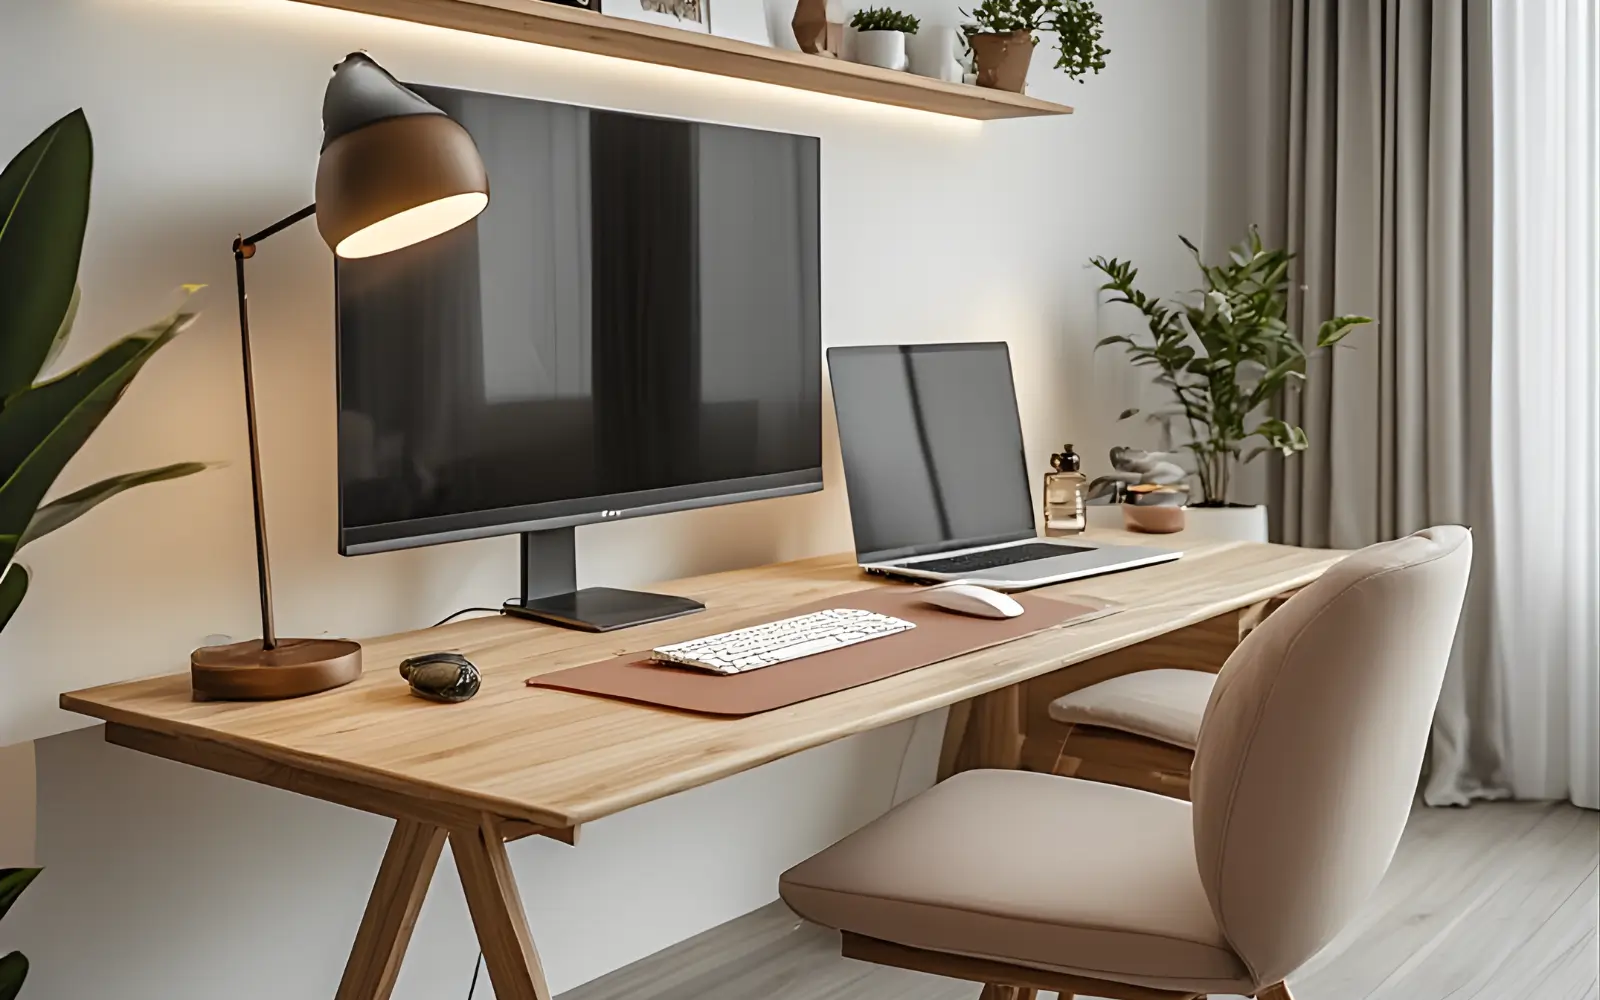
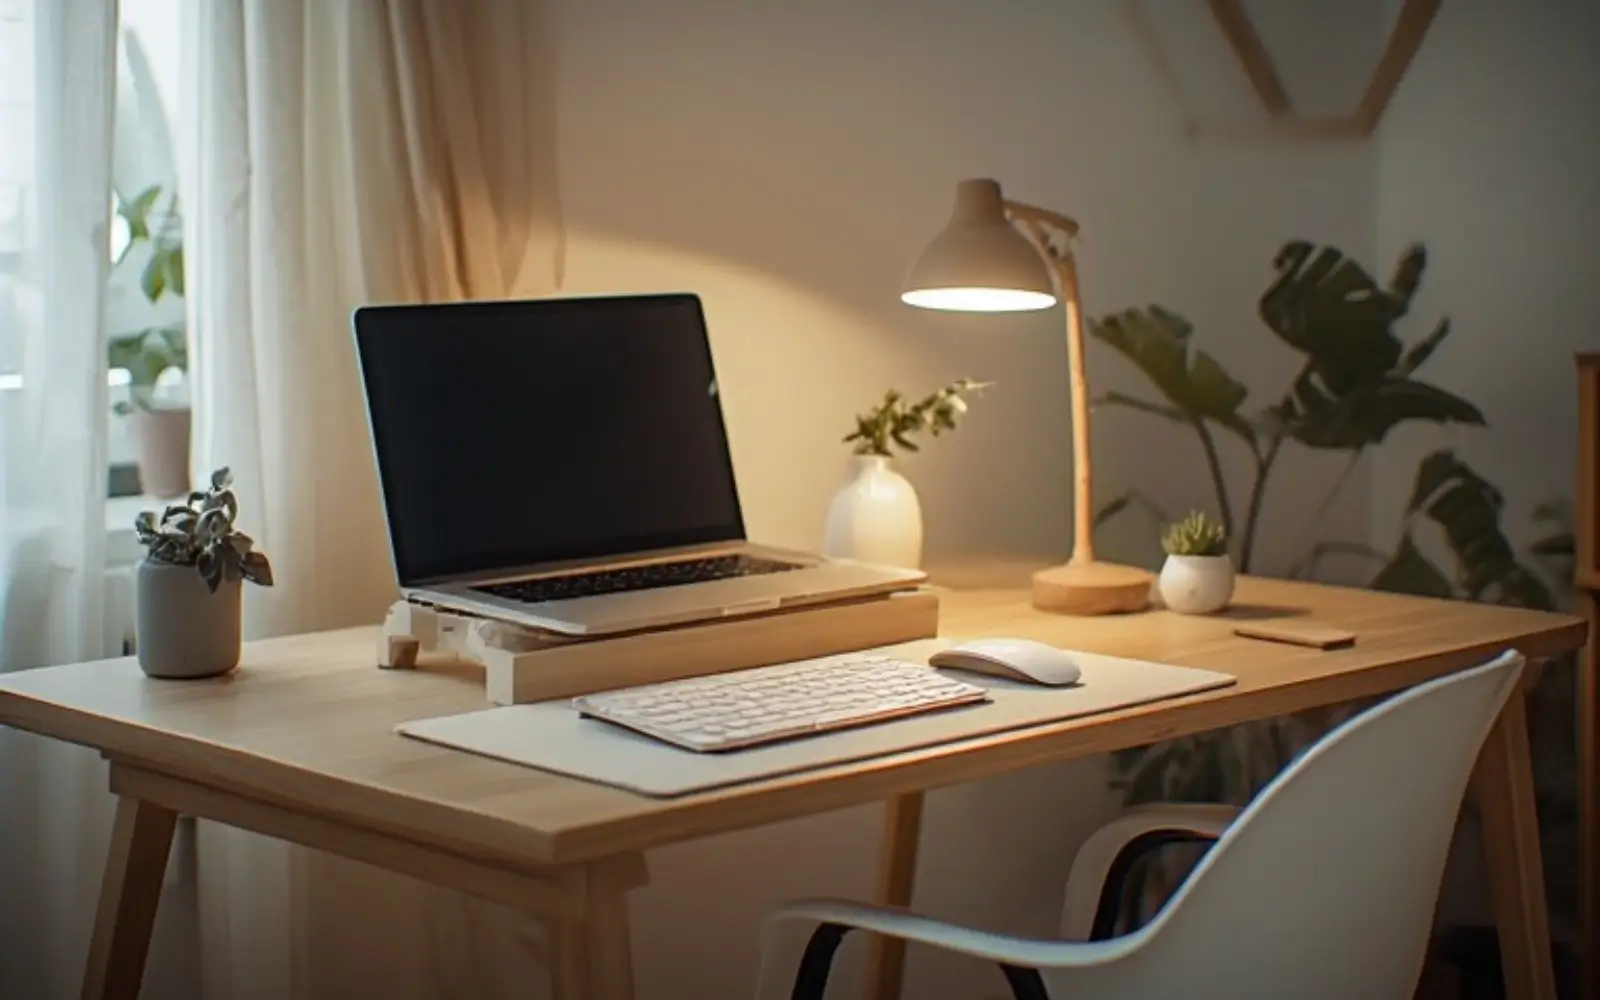
COMPLETE SETUP
A full small-apartment home office essentials setup with desk, chair, screens, lighting and storage working together in one feminine corner.
What “essentials” really mean in a small apartment
Before talking about specific products, it helps to define what you are actually solving for. Essentials in a small apartment mean something different from a standard office-furniture checklist.
The difference between office furniture and home-ready furniture
Corporate office furniture is designed to survive a decade in a cubicle farm. It is wide, deep, heavy and built for a space where nothing else has to coexist with it. That is why a standard 160×80 cm office desk or a typical task chair with a towering mesh back looks jarring in a living room or bedroom – it was not designed to share visual space with a sofa, soft lighting and personal decor.
The good news is that ergonomic and feminine are not opposites. A chair can have lumbar support and come upholstered in warm cream boucle. A desk can be the right depth for a monitor setup and have legs in brushed brass. The products exist. The skill is knowing which specifications matter so you do not trade function for aesthetics – or aesthetics for function.
Constraints of small apartments
Working in a small apartment introduces real constraints that do not exist in a dedicated office:
- Limited floor area and depth – every centimetre of desk depth that extends into the room is a centimetre you cannot reclaim for living.
- Shared rooms – your office zone is also your bedroom or living room and the furniture has to read as home furniture first and office furniture second.
- Multiple viewing angles, including camera – your setup is permanently on display to you, to colleagues on calls and to guests.
- Storage cannot scale infinitely – you cannot simply add a filing cabinet and three bookcases; everything near the desk must earn its place.
Your core essential categories
This guide covers six categories in detail, in order of ergonomic and functional priority:
- Desk – your primary work surface and anchor of the zone
- Chair – the component that most affects your physical health
- Screens and stands – laptop, monitor and eye-level comfort
- Lighting – task and ambient, including how you look on camera
- Near-desk storage – the minimum you need within arm’s reach
- Desktop accessories – curated objects that complete the setup
This section focuses on dimensions, ergonomics, material choices and buying priorities for each category, plus budget-based starter kits and a phased upgrade plan. Deep cable routing and wall storage systems live in the Storage & Tech pillar; full wall decor, colour palette strategy and mood live in the Decor Ideas pillar.
Essential 1: The right desk for a tiny footprint
The desk is the foundation of your home office zone. Choosing the wrong size – usually too deep, sometimes too narrow – is the most common and most expensive mistake in small-apartment setups.
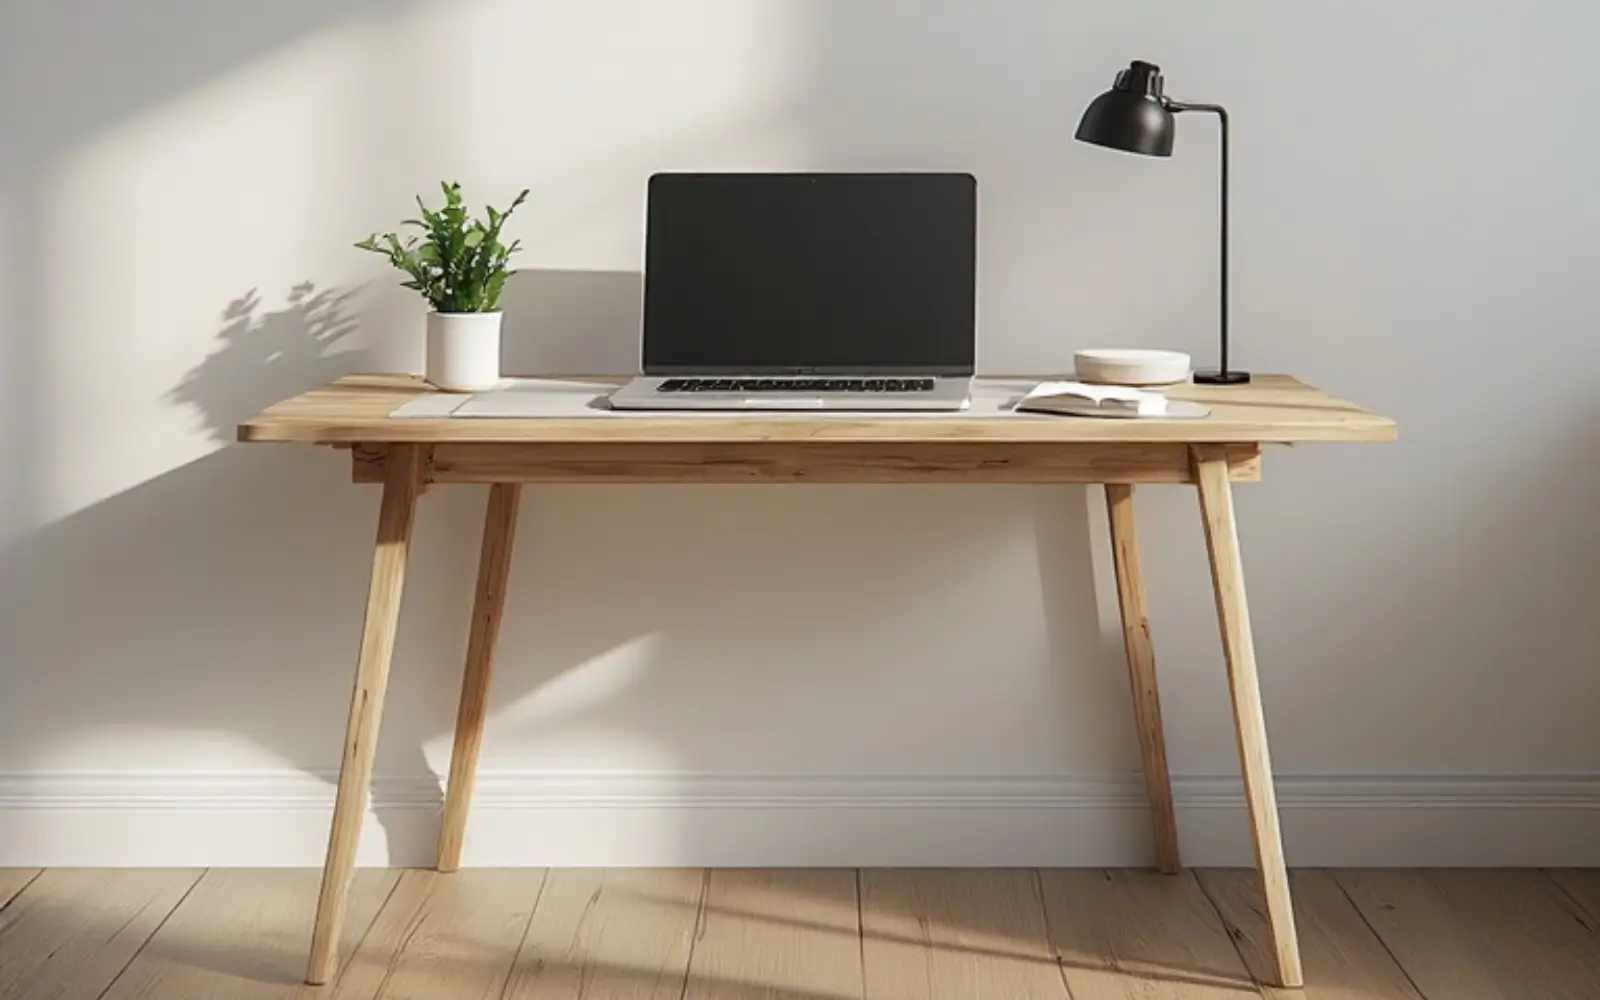
COMPACT DESK
A narrow, small-apartment-friendly desk that gives you enough depth to work while still respecting limited floor space.
Depth, width and shape for small apartments
Desk depth is the single most misunderstood measurement when buying for a small apartment. Most people focus on width, but depth is what determines whether the desk integrates into the room or dominates it.
Depth guidelines:
- 45–50 cm is the workable minimum for a laptop-only setup or an extremely tight wall.
- 55–60 cm is the sweet spot for a full workstation with a laptop on a stand and external keyboard or a compact monitor.
- Anything over 65 cm starts to feel like office furniture in a small apartment and should only be used in a genuine alcove.
Width guidelines:
- 80–100 cm works for a compact, laptop-centred setup with storage handled by a separate drawer unit.
- 110–120 cm gives room for a monitor, notebook and small accessories – ideal for most full-time setups.
- Below 80 cm is only viable for occasional use or very minimal setups.
When a desk is too deep for the room you sit further from the wall than necessary, you lose walkable floor space and the desk starts to read as the dominant piece of furniture in the room rather than a considered element of it.
Desk types that work in tiny spaces
- Straight rectangular desks are the most versatile and the safest default for small apartments.
- Console tables used as desks can work beautifully when you need the desk to read as furniture first, but most lack storage and are best for laptop-only setups.
- Wall-mounted and fold-down desks are excellent for studios and hallway niches where the desk must disappear between uses, but mounted height is fixed so check ergonomics carefully.
- Corner and L-shaped desks sound efficient but often consume more floor area than a straight desk; they only make sense in genuine, otherwise-unused corners.
Finishes that feel feminine and photograph well
The finish of your desk ties it to the rest of your space. In a small apartment, where the desk is visible from the sofa or bed, the visual weight of the surface matters.
Finishes that work well:
- Light natural wood such as oak, birch or pale walnut
- Warm white or off-white
- Soft grey with warm undertones
- Dusty rose, sage or soft clay as subtle accents
Finishes to approach with caution:
- High-gloss black or very dark wood that shrinks the room
- Very thick or chunky legs that feel heavy in small spaces
- Highly industrial finishes that fight against a feminine, home-first aesthetic
Buying guidelines by budget
- Low budget: prioritise stability, correct depth and enough width; finish can be refined later with mats and accessories.
- Medium budget: look for better materials, more refined finishes and integrated drawers where useful.
- High budget: invest in solid or high-quality engineered surfaces, refined hardware and custom-friendly dimensions – worth it if you work from home most days.
Essential 2: A feminine chair that is actually ergonomic
The chair is where most small-apartment setups fail. Either the chair is beautiful and useless after two hours or it is functional and looks like it came from a corporate call centre.
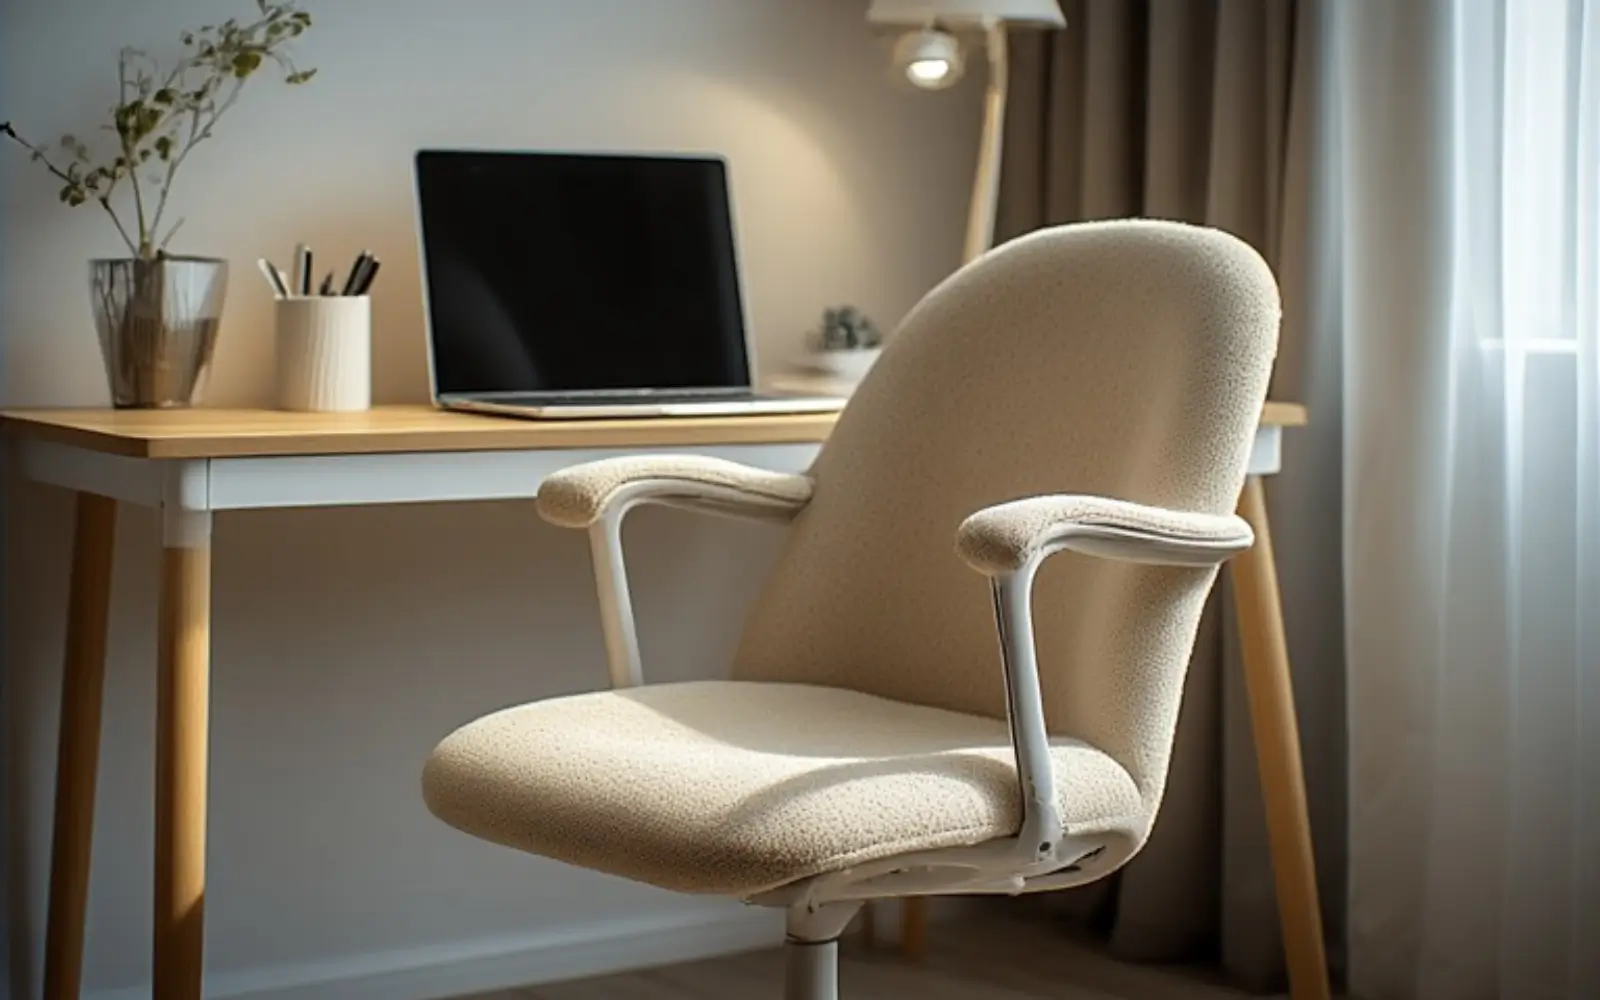
ERGONOMIC CHAIR
A feminine upholstered chair that still delivers real ergonomic support for full workdays.
Why a pretty dining chair is not enough
A dining chair is designed for short meals, not six hours of focused work. It has a fixed height, no lumbar curve, no seat depth adjustment and minimal cushioning. Using one as your primary work chair will quickly lead to lower back pain, hip discomfort and posture problems.
What to look for in an ergonomic yet feminine chair
You do not need a spaceship-grade task chair; you need a few non-negotiable features:
- Adjustable seat height so your feet rest flat on the floor with knees around 90 degrees.
- A backrest with real lumbar support that follows the natural curve of your lower back.
- Seat depth that leaves a small gap behind your knees so thighs are supported but not compressed.
- Armrests that can be lowered or removed so you can sit close enough to the desk.
- A base and casters suited to your flooring so you feel stable, not wobbly.
Materials and colours that fit a feminine home office
Treat the chair as an upholstered accent piece that belongs in the room even when the desk is not in use.
Materials that read as home-friendly:
- Boucle or other textured upholstery
- Velvet or soft woven fabrics
- Cream or sand faux leather where easy cleaning is a plus
Colours that work well:
- Dusty rose, blush or soft terracotta
- Warm cream, oat or sand
- Soft grey or greige
- Sage or eucalyptus green
Gaming chairs and aggressively styled office chairs rarely fit a feminine home office visually and are often optimised for reclined gaming postures, not upright work.
Chair buying checklist
- Seat height works with your body and desk height
- Lumbar support is present and feels natural
- Seat depth leaves a small gap behind your knees
- Armrests clear the underside of your desk
- Material feels like home furniture, not office
- Colour matches your palette so it blends into the room
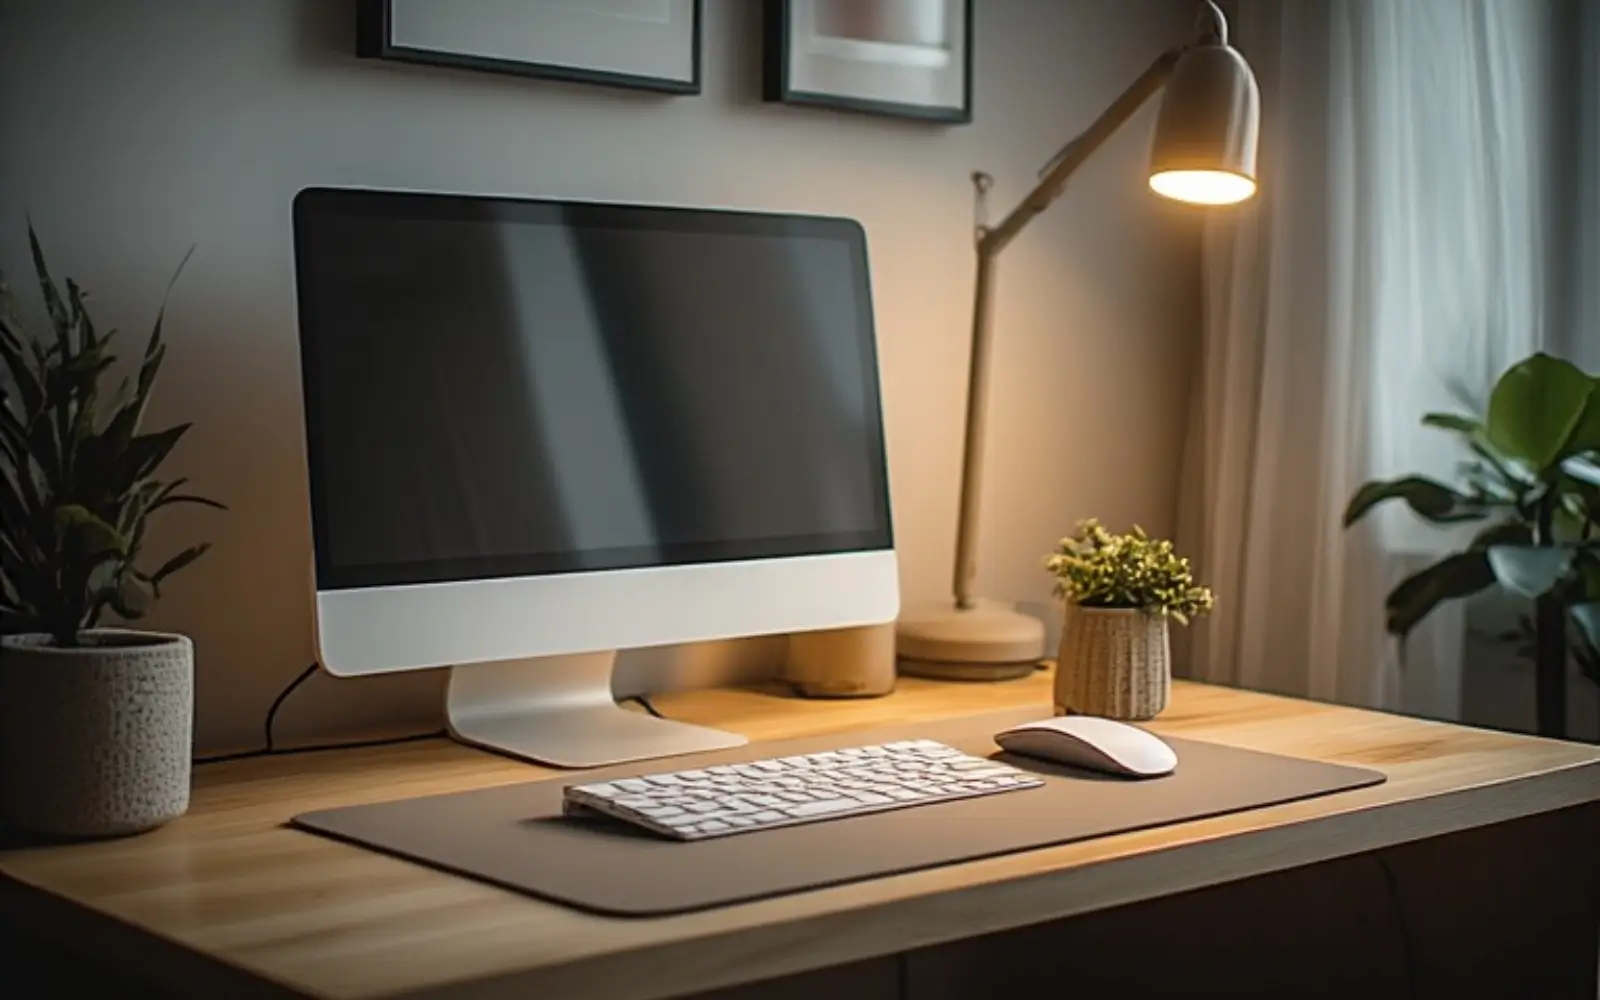
Essential 3: Screens, stands and eye-level comfort
Your screen setup determines your posture from the neck up. Get this right and you eliminate one of the biggest causes of end-of-day headaches and neck stiffness.
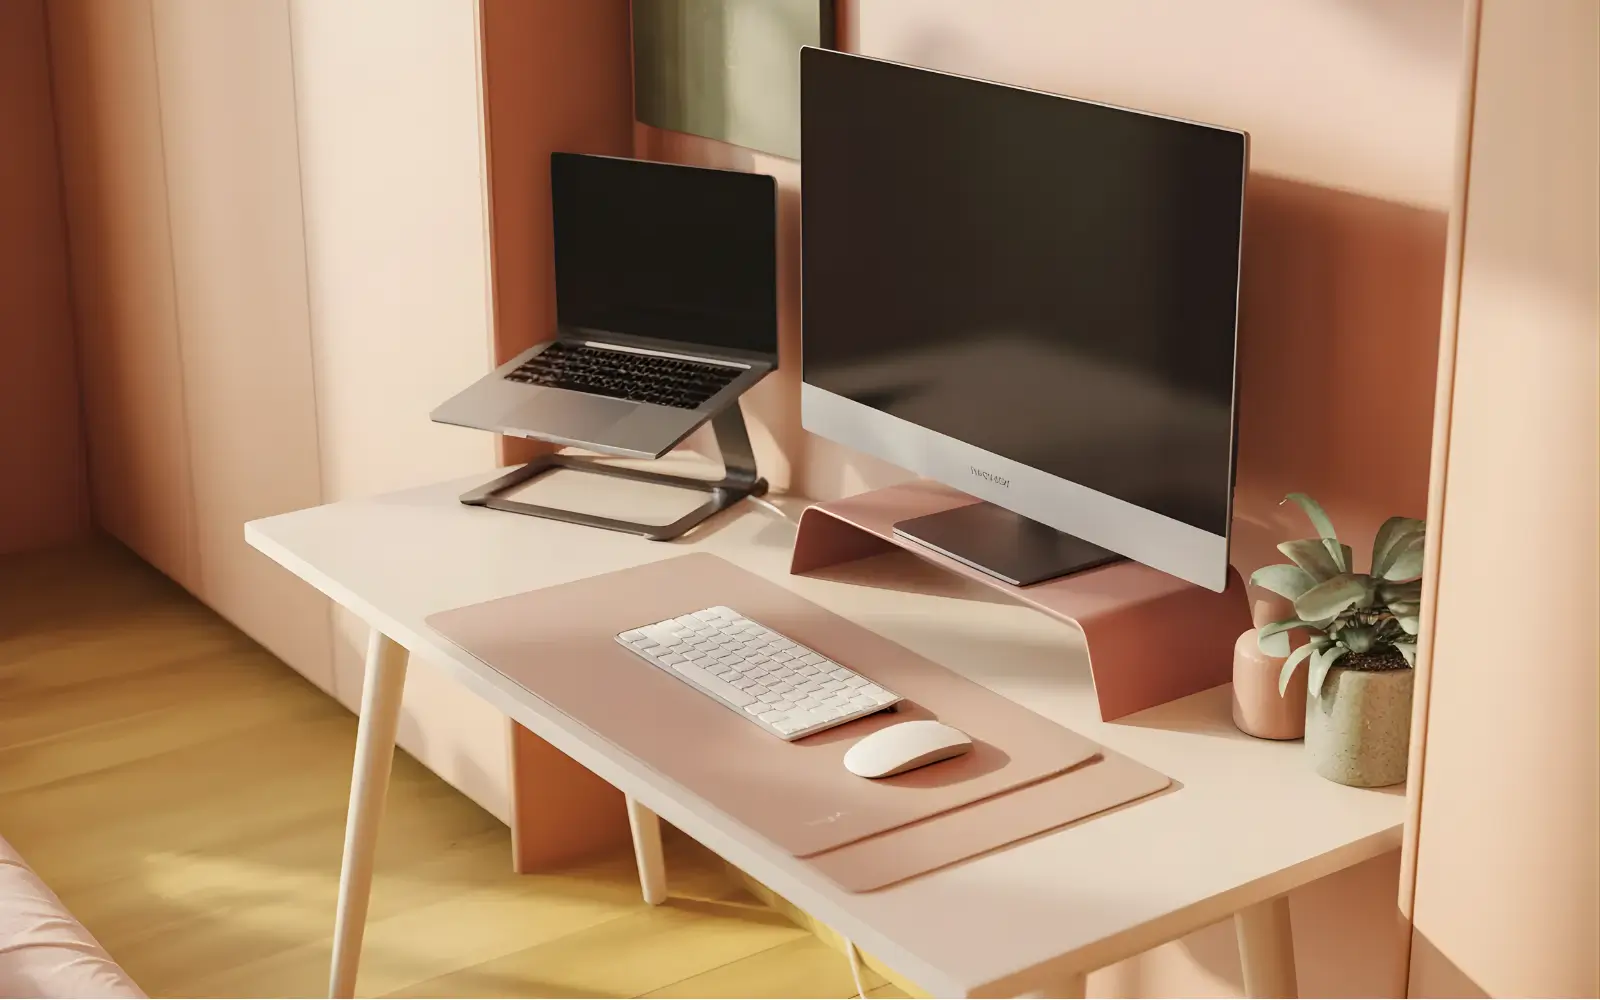
SCREEN SETUP
A compact monitor and elevated laptop arranged so your eyes, neck and cables all stay comfortable.
Laptop-only setups vs laptop plus monitor
A laptop-only setup is entirely workable if you raise the screen to eye level. For multiwindow or more visual work, a separate monitor becomes worth the investment, especially in a small apartment where it also anchors a clean, static camera setup.
Why a laptop stand is non-negotiable
When a laptop sits flat on a desk the screen is far below eye level, forcing you to crane your neck forward. A laptop stand raises the screen so the top sits at or just below eye level and your neck can stay neutral. It does mean you need an external keyboard and mouse as well – budget for all three together.
Compact monitor choices for small desks
For small-apartment desks, the right monitor size is usually between 24 and 27 inches. Below 24 inches you do not gain much over a laptop; above 27 inches the monitor dominates the desk and the room.
- Choose thin bezels and a simple, compact stand.
- Prefer IPS or similar panels with good viewing angles and comfortable brightness.
- Look for a USB-C input if your laptop supports it to reduce cable clutter.
Cables and power basics
A clean screen setup needs at least one power strip with an on/off switch positioned off the desk surface and one intentional cable route from the strip to the desk. Full cable concealment and advanced routing live in the Storage & Tech pillar; here the goal is simply one neat path rather than a tangle of chargers.
Essential 4: Lighting that works for work and looks good on camera
Lighting is often an afterthought but in a small-apartment home office it does three jobs at once: supports focused work, flatters your face on video calls and creates the ambient quality that makes the space feel like a home.
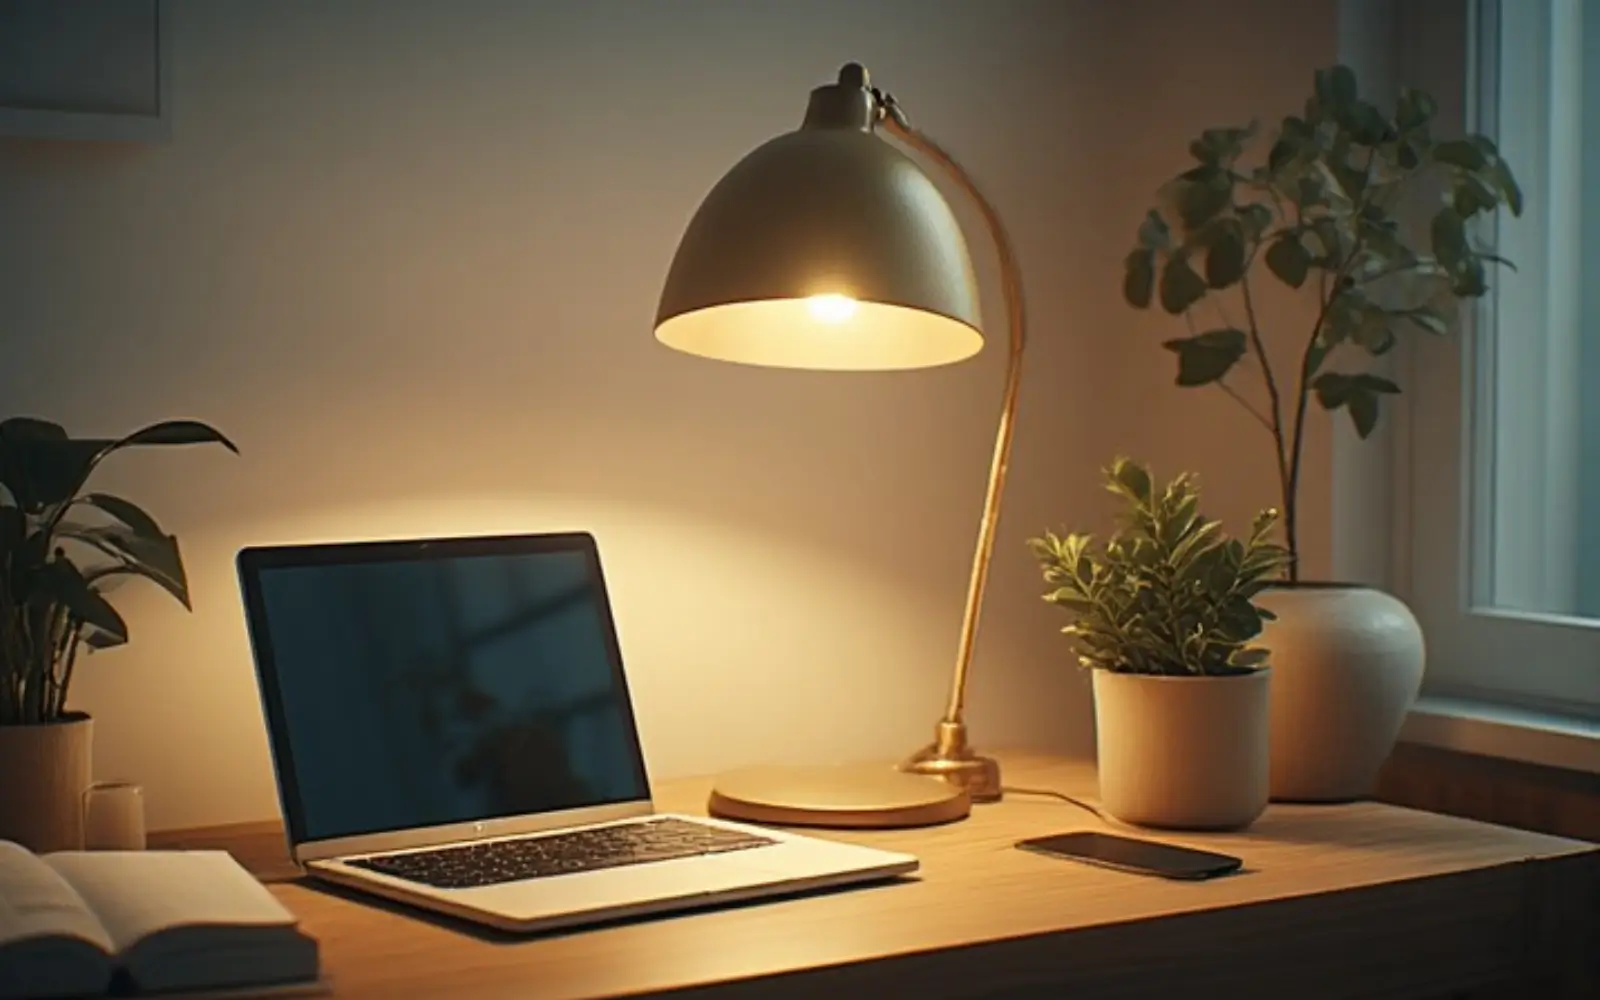
WARM LIGHTING
Layered task and ambient lighting that keeps your desk usable, flattering and calm after dark.
Task lighting vs ambient lighting
Task lighting is the direct light over your work surface – usually a desk lamp. Ambient lighting is the general light in the room from ceiling fixtures or floor lamps. You need both: task light for clarity and ambient light to reduce harsh contrast between your screen and the room.
Light positions that flatter your face and your space
For video calls the most flattering position is a light source at roughly 45 degrees to the side of your face, slightly above eye level and facing toward you. Overhead-only lighting or a window directly behind you both create unflattering shadows or silhouettes.
Lamp styles that suit a feminine small apartment
Choose slim metal or ceramic bases in brass, white or warm neutrals and fabric or frosted shades that diffuse light softly. Avoid oversized shades and chunky bases that visually overpower a small desk.
Bulb colour temperature and brightness
For most home offices, 2700–3000K warm white bulbs are ideal – flattering on camera and calm for long use. Neutral 4000K can work for detail-heavy tasks but often feels colder in small apartments. Aim for 400–600 lumens for a desk lamp and choose dimmable options where possible so you can shift from focused work mode to gentle evening light.
Essential 5: Smart storage close to the desk
Near-desk storage is not a full storage system. It is the minimum you need within arm’s reach so the surface can stay clear and the room still feel light.
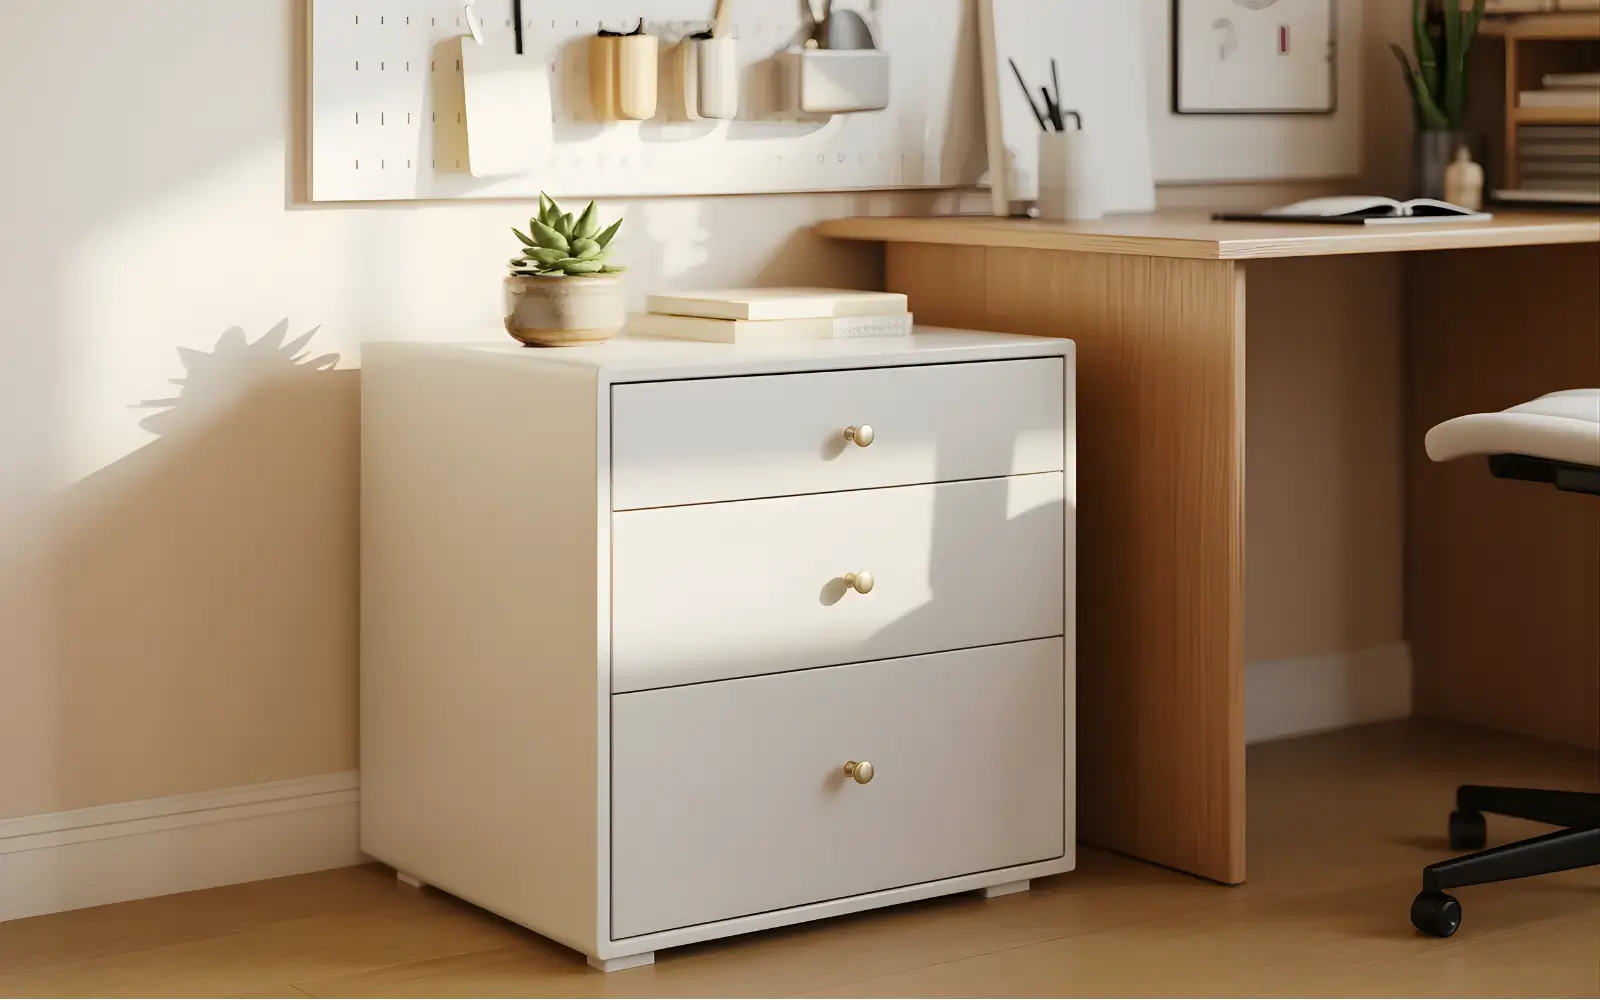
NEAR-DESK STORAGE
A slim pedestal and vertical storage that give you enough space without crowding a tiny room.
The one drawer unit you actually need
A slim pedestal or under-desk drawer unit roughly 30–40 cm wide is often enough. Organise drawers by frequency of use: daily tools in the top, active projects in the middle and rarely used supplies in the bottom.
Vertical helpers: pegboards, grids and slim shelves
A single pegboard, wall rail or floating shelf above the desk uses vertical space without crowding the floor. Limit visible items to five to seven so the view stays calm, not chaotic.
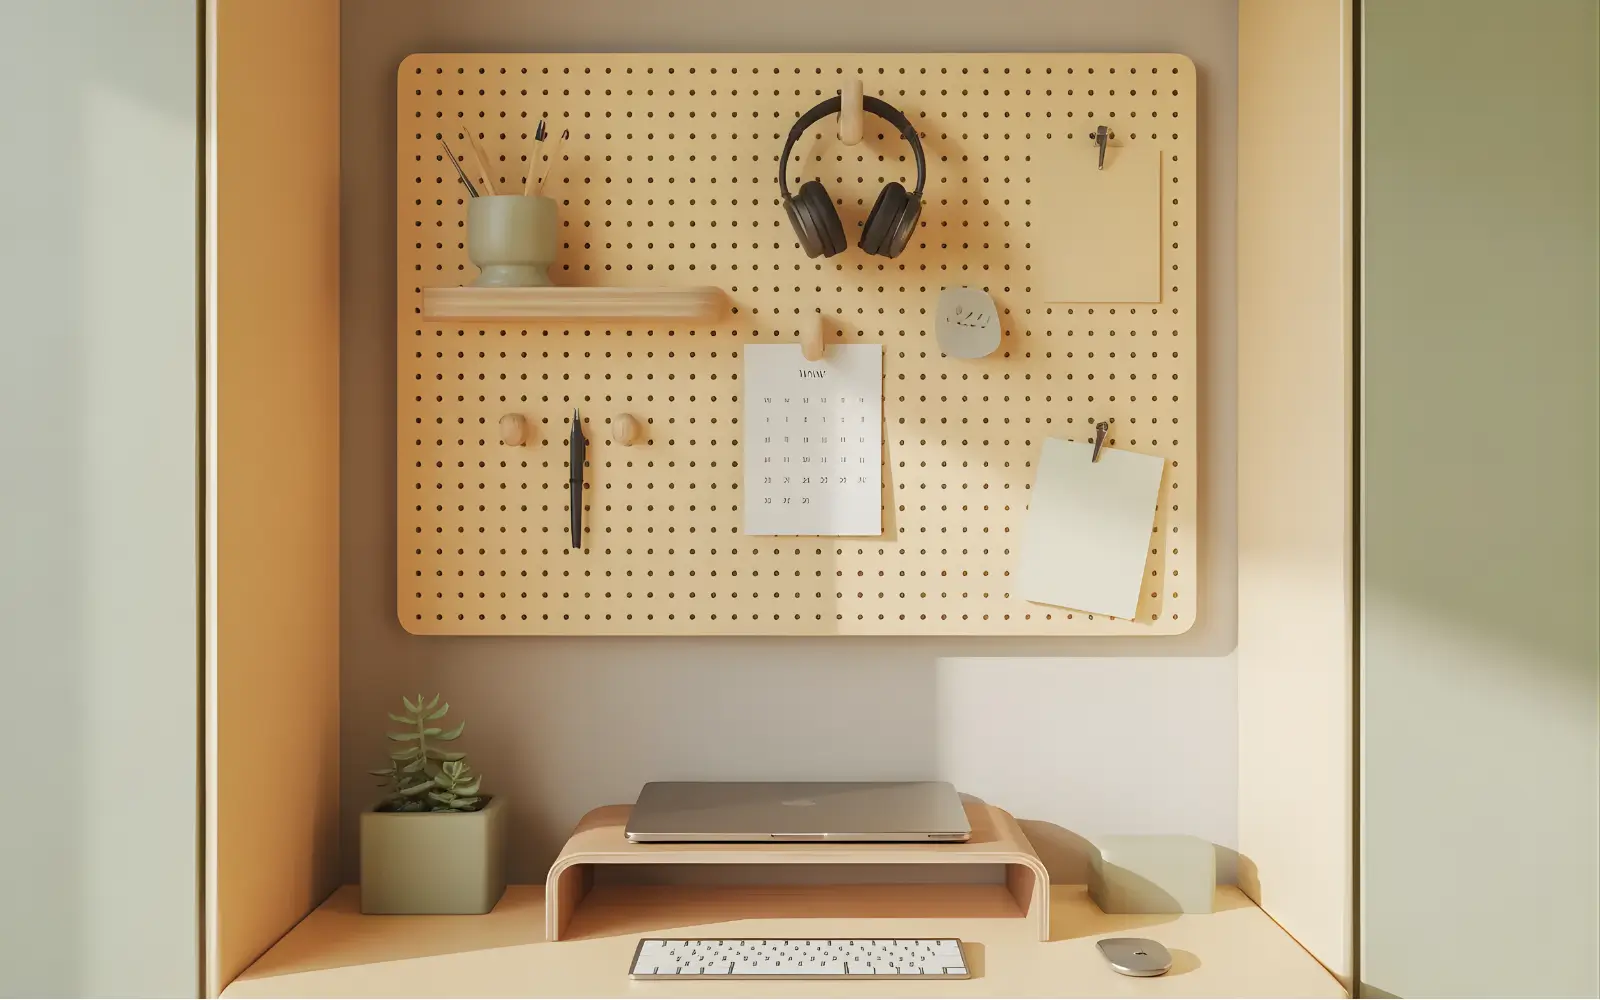
VERTICAL HELPERS
A compact pegboard that holds only your most-used tools so the background stays calm.
What should live within arm’s reach
Apply a strict rule to the desk zone: daily-use items only. Laptop, keyboard, notebook, pen, active documents and one charger earn a place. Archive documents, spare supplies and occasional tools belong in the wider apartment storage system, which the Storage & Tech pillar covers in depth.
Essential 6: Desktop accessories – curated, not cluttered
Everything that lives on your desk surface is visible every day – on calls, in photos and every time you sit down to work. The accessories either make the space feel considered and calm or like organised chaos.
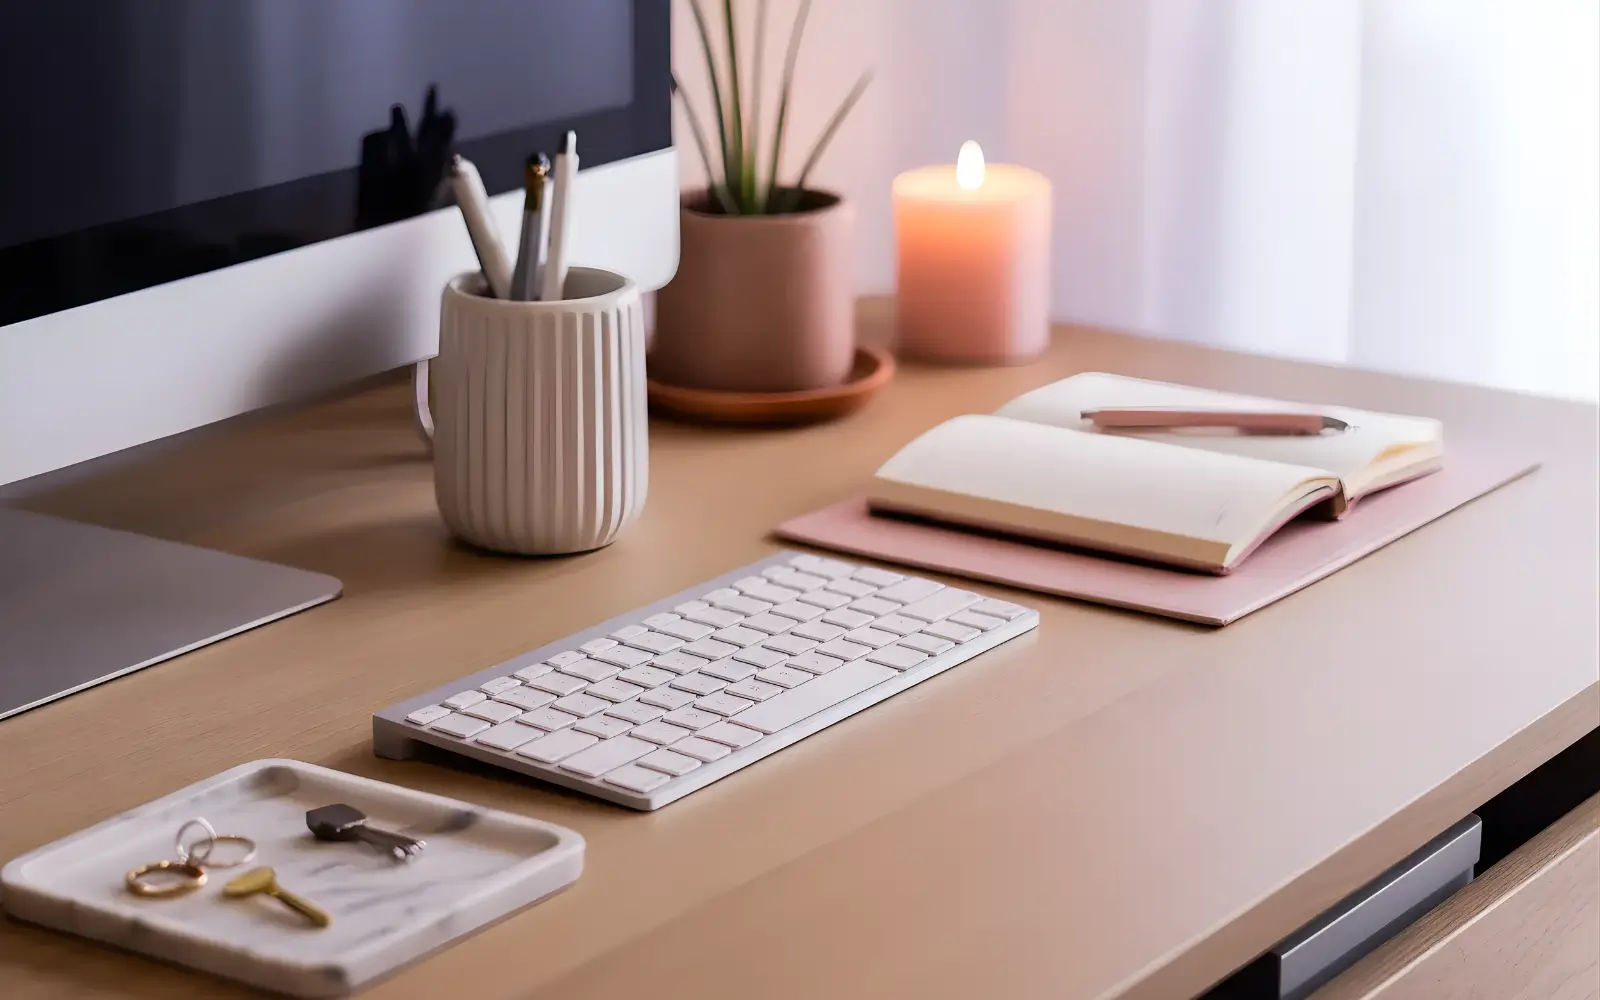
CURATED SURFACE
A five-to-seven objects desk surface that looks styled but still leaves room to work.
Functional essentials
- Keyboard and mouse sized sensibly for your desk
- A single desk mat to unify the work area and protect the surface
- One pen cup for the pens you actually use
- One current notebook
- One small tray for rings, keys and small personal items
Aesthetic anchors and the five-to-seven objects rule
Beyond functional tools, three decorative objects are enough to give your desk personality: one small plant, one candle and one meaningful decorative object. Together with your core tools this keeps the total number of visible objects in the five-to-seven range that feels calm, not cluttered.
Daily reset ritual
A two-minute end-of-day reset keeps a small-apartment workspace feeling like a home, not a permanently half-finished project: close the laptop or turn off the monitor, return loose items to their homes, clear or stack paperwork and wipe the mat. The ritual matters as much as the furniture.
Budget-based starter kits: essentials by price point
You do not need to buy everything at once. These example kits show how to assemble a coherent setup at different investment levels.
Kit 1: Ultra-compact starter on a tight budget
For stopping the sofa-work cycle quickly when space and money are limited:
BUDGET STARTER KIT
A simple, affordable setup that stops sofa-working fast and still feels intentional.
- Simple 100×50 cm desk in white or light wood
- Basic adjustable task chair with lumbar support you can upgrade later
- Aluminium laptop stand, wireless keyboard and mouse
- One adjustable desk lamp with warm bulb
- Small organiser tray and pencil cup
- Desk mat, notebook and one small plant
Total cost depends on brands, but this kit proves you can assemble a real workspace without overspending if you buy in the right order.
Kit 2: Comfortable daily setup on a moderate budget
For three to five work-from-home days per week and a setup you genuinely enjoy using:
- Quality 110–120×55–60 cm desk in light wood or warm white
- Ergonomic chair with real lumbar support and home-friendly upholstery
- 24-inch IPS monitor, laptop stand, compact keyboard and mouse
- Dimmable desk lamp plus one ambient room light source
- Slim under-desk pedestal with two drawers for daily storage
- Leather or vegan-leather desk mat and a few quality accessories
If your budget is tight at this level, prioritise the chair and desk first and add the monitor later.
Kit 3: Long-term investment setup
For long-term, full-time home workers who want to invest once in a setup that will last for years:
LONG-TERM SETUP
A high-investment desk and chair combination designed to support full-time home work for years.
- Solid or premium engineered desk with integrated cable-management
- High-spec ergonomic chair with full adjustability and beautiful upholstery
- 27-inch high-quality monitor with USB-C, plus premium stand, keyboard and mouse
- Premium articulated desk lamp and carefully planned ambient lighting
- Matching pedestal, shelf or pegboard and a small set of long-lasting accessories
At this level more than half of the budget should go into the chair and desk – the pieces that directly support your body every day.
How to upgrade your existing setup in three phases
You do not have to change everything at once. Most people get the best results by phasing upgrades in order of impact.
Phase 1: Fix what hurts
- Order a laptop stand, compact keyboard and mouse to correct screen height and neck position.
- Assess your chair and upgrade if it lacks lumbar support and height adjustment.
- Add at least one warm desk lamp if you do not have task lighting yet.
Phase 2: Fix clutter and lighting
- Add a near-desk storage unit such as a pedestal or desktop organiser.
- Improve lighting by upgrading the lamp and adding ambient room light.
- Establish a daily reset ritual so the desk starts and ends each day clear.
- Install and style any pegboard or shelf you need, then stop at five to seven items.
Phase 3: Refine aesthetics and long-term choices
- Upgrade the desk to a piece that fits your space and style perfectly.
- Upgrade the chair to a high-quality model you can keep for years.
- Align finishes, accessories and lighting into a coherent palette.
- Add or upgrade a monitor once you know your workflow benefits from it.
FAQ: Home office essentials for small apartments
These quick answers cover the questions that come up most often when women start building a home office in a small apartment.
Do I really need a separate desk if I already have a dining table?
A dining table can work as a temporary workspace but creates two persistent problems: the height is usually wrong and you must pack up every time you need the table for eating. If you work from home more than two days per week, a dedicated desk – even a compact one – is one of the most impactful investments you can make.
What is the minimum desk size for a full-time setup?
A functional minimum for a full-time setup with a laptop on a stand and external keyboard is around 90 cm wide by 50 cm deep. If you add an external monitor, aim for at least 100–110 cm width so the surface does not feel cramped.
Are gaming chairs good ergonomic chairs for a feminine home office?
Most gaming chairs are optimised for reclined postures rather than upright desk work and their styling rarely suits a calm, feminine space. A simpler ergonomic task chair with adjustable lumbar support is almost always a better choice.
How can I make a cheap desk look more premium?
A quality desk mat that covers most of the surface, matching accessories in a coherent palette and good warm lighting change the impression more than the desk itself. Surface updates such as peel-and-stick finishes can also make a basic desk photograph far better.
How do I decide whether to invest in a chair or a monitor first?
If you are in pain – back, neck or hips – invest in the chair first. If you are physically comfortable but constantly frustrated by limited screen space, invest in the monitor. In most cases, the chair has the bigger long-term impact on your health.
How many storage pieces do I actually need near my desk?
For most small-apartment setups, one pedestal or drawer unit and one vertical element such as a shelf or pegboard are enough. Anything beyond that is usually either misplaced or future clutter.
What is the biggest mistake people make when buying furniture for a small-apartment home office?
The biggest mistake is buying based on aesthetics before dimensions – choosing a desk or chair that looks perfect online but does not fit the room or your body. Measuring your space and comparing it to product dimensions before buying prevents most regrets.
Backgrounds and lighting that love you on camera
The wall behind you on a video call is not just backdrop. It is the first impression many people have of your home and it quietly communicates how organised, thoughtful and professional you are.
Choose one calm background wall
Before you buy art or shelves, decide which single wall will serve as your background and treat it as a design project. Ideally it is the wall your desk faces so the camera looks at it directly. Keep the floor in that view clear – no stacked boxes, no trailing cables, no coat rack.
The most camera-friendly backgrounds share three traits: calm colour, a few elements at different heights and consistency in style. Warm white, soft greige or a single muted tone all work well; they let you stand out rather than the wall.
If you use wallpaper, choose subtle patterns that read as texture from a distance – tone-on-tone stripes, small grids or soft botanicals. Large, high-contrast patterns tend to overpower your face on screen.
LIGHTING LAYERS
Side window light, warm desk lamp and a soft background glow – a practical three-layer lighting setup that flatters you on camera.
Feminine wall decor that still looks professional
The goal is restraint with intention. One larger framed piece, or a pair of medium prints hung at the same height, looks more sophisticated than a collage of many small items. Choose frames and colours that tie into the rest of your room so the background feels like part of the home, not a separate stage set.
Layer your lighting: desk, background and ambient
Most small apartments rely on a single overhead ceiling light, which is the worst lighting for focused work and video calls. The fix is to layer three types of light: task, background and ambient.
Place your task light on the same side as your non-dominant hand so it illuminates the desk without throwing harsh shadows across your writing or keyboard. Choose warm bulbs around 2700–3000K for both desk and background lights; they are easier on the eyes and more flattering on camera than cool white.
A small lamp behind you on a shelf or surface lifts the wall in frame and adds depth. Natural light should ideally come from the side – never directly behind you, which backlights you, or straight in front of you, which causes glare.
Ring lights can be useful when video calls are central to your work, but treat them as a finishing touch, not a substitute for thoughtful ambient and task lighting.
Hide the mess – storage, tech and cables
A calm, deliberately styled home office does not happen by accident. It happens because you design a system and then follow it. This section is that system: storage that looks like living-room furniture, cable routes that survive real life in a rental and tech choices that disappear into a soft, feminine palette instead of fighting it.
If your layout, ergonomics and decor are already in place, this is the part that turns theory into a daily practice.
Clutter is a storage problem, not a personality flaw
Most people who describe themselves as messy or disorganised are simply under-stored. Their office is not missing discipline – it is missing closed doors, dedicated homes for cables and a clear surface rule. Once the infrastructure exists, tidiness largely takes care of itself.
Open shelving looks beautiful in styled photos because someone spends hours arranging it for a single shot. In a small apartment it quickly becomes a landing zone for whatever is in your hand – cables, notes, cups – and the visual noise never really resets. Closed storage in the same footprint creates calm.
Tech clutter is especially disruptive in feminine spaces: dark, plastic-coated cables cut across soft textiles and light finishes. The solution is not to own less tech but to design a routing and storage system so that nothing visible is accidental.
Treat this as a one-time design project. You measure, plan, route and label once. After that, the daily maintenance drops to a two–three minute reset.
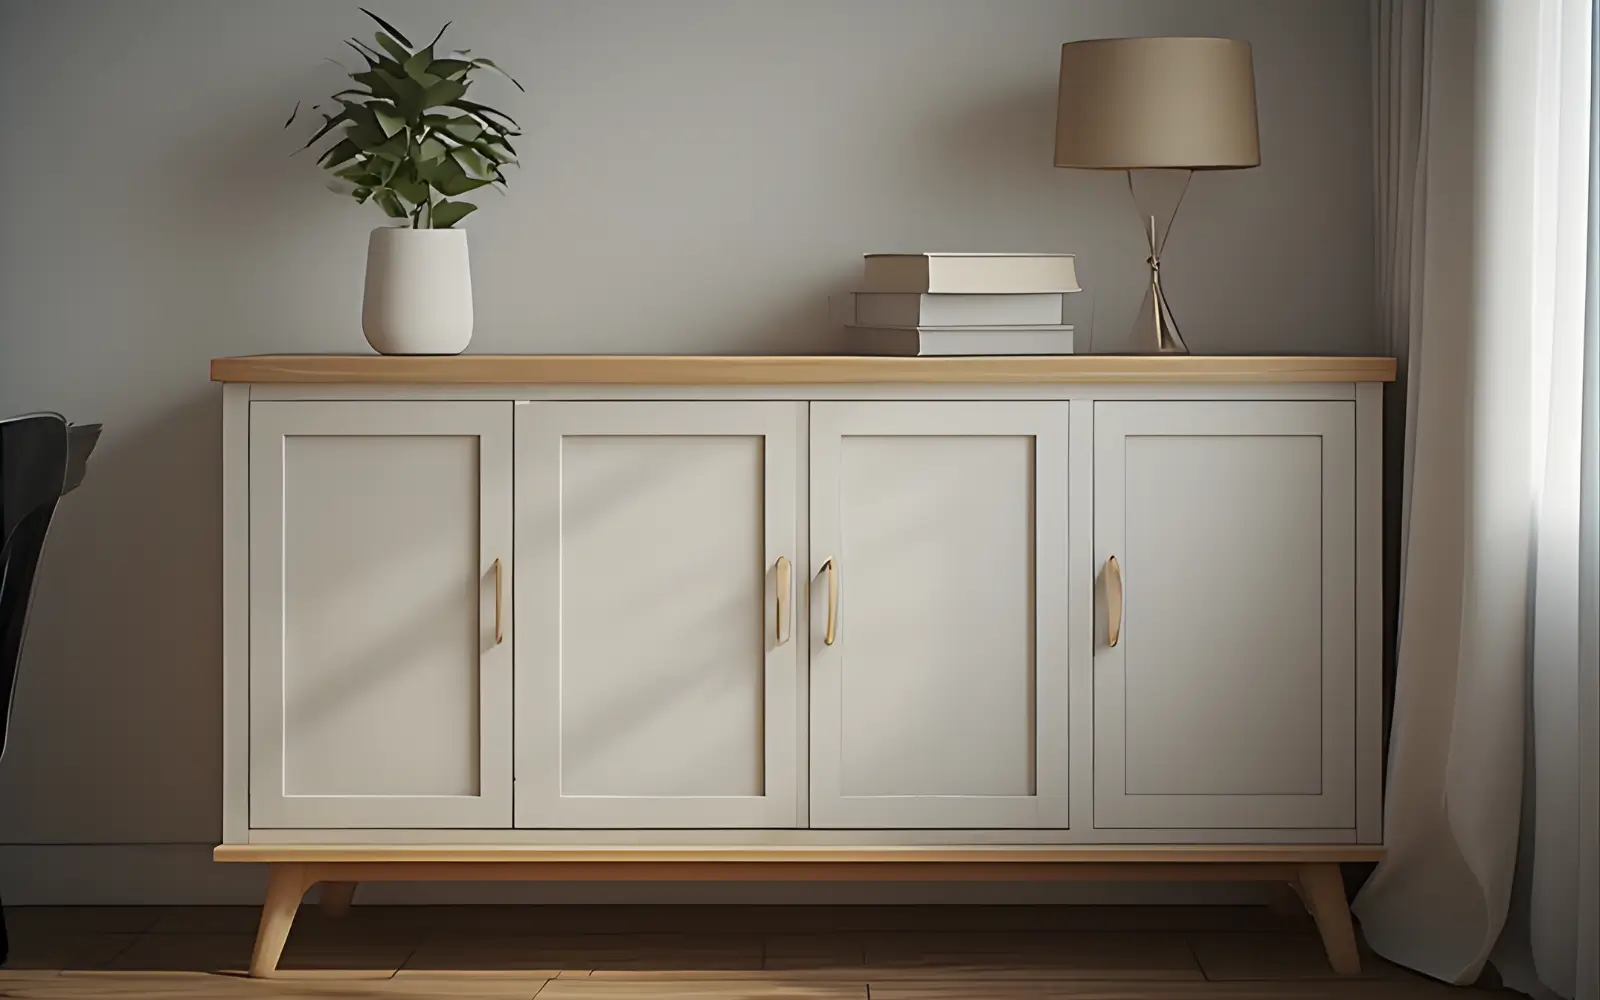
Storage that looks like living-room furniture
In a living room or studio home office, the right storage is not office furniture – it is furniture that happens to hold office things. You want pieces that look at home in the room even when you are not working.
A low sideboard or dresser is the most versatile single storage piece. Closed doors hide everything inside, a flat top surface holds a lamp, plant or styled object and the footprint stays close to the wall.
- Width around 100–160 cm for meaningful capacity.
- Height 70–85 cm so the room still feels tall but the piece can hide a printer or files.
- Depth 35–45 cm so it does not protrude too far into a small room.
- Adjustable shelves so you can reconfigure as your storage needs change.
- Solid doors in a matte finish; glass doors reveal contents and defeat the purpose.
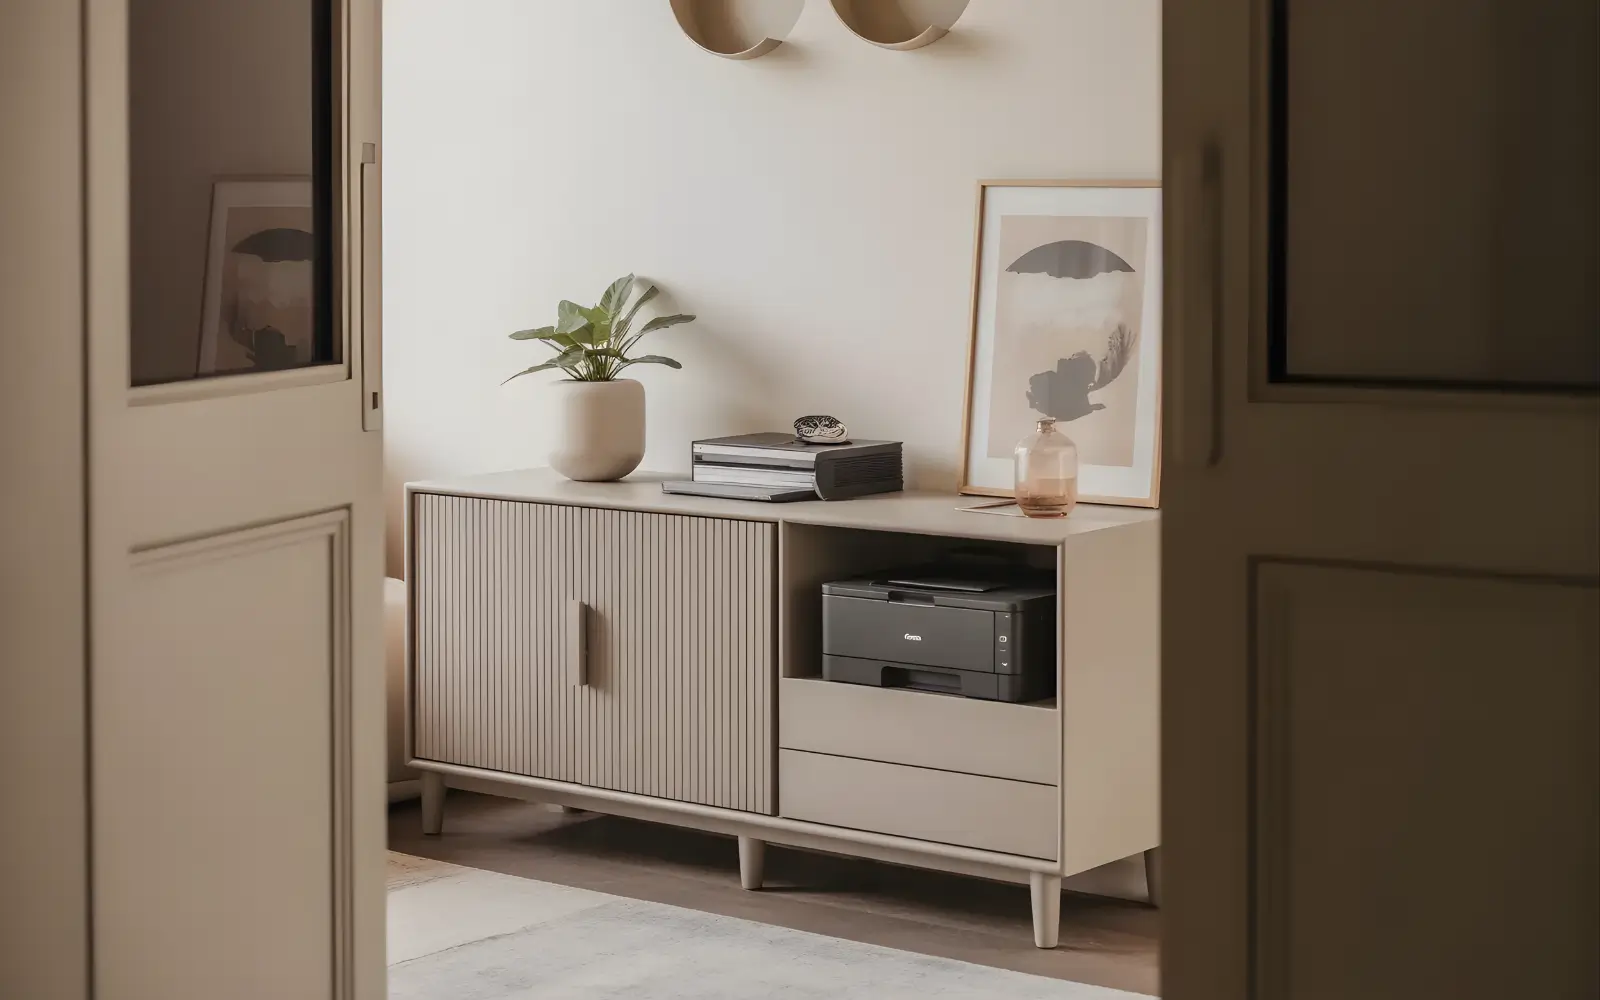
STORAGE & CABLES
Low cabinet acting as the main home for printer, paperwork and tech – the difference between a cozy office corner and a cluttered one.
Make the desk surface boring (in a beautiful way)
The desk surface is the visual centre of your office. Keeping it clear is not about being naturally tidy – it is about knowing what is allowed to live there and giving everything else a home.
A complete, camera-ready desktop usually contains one screen (laptop on a stand or monitor), keyboard and mouse, one lamp, one decorative object or plant and a desk mat that defines the working zone. Everything else is temporary.
Paperwork in progress goes to a tray or vertical file holder, pens and stationery to a drawer insert, chargers to a single drawer or box, headphones to a hook or drawer and notebooks to a shelf. If you do not reach for something several times a day, it does not earn permanent desk space.
- Power down devices at the end of the day.
- Remove anything that is not a permanent desk resident.
- Put each item away in its designated home.
- Coil the charging cable along its route or back into the drawer.
- Straighten the mat and centre the keyboard.
- Do a quick visual check from the doorway – the desk should read as calm and intentional.
DESK RESET
A reset-ready desktop – one screen, one lamp and one object – so the space reads calm on camera and in real life.
Cable management that survives real life
Cables are structural – you cannot just move them to a drawer. The fix is a routing hierarchy from device to outlet so every section of the path is either hidden or intentionally tidied.
On the desk, cables should only be visible where they connect to the device. Under the desk, adhesive clips run them in a clean line into a cable tray or basket that holds the power strip and excess length. From there, a single bundled run goes down to the floor and along the wall to the socket.
Hide the power strip and router inside a cable box or inside a sideboard compartment with a cable cut-out at the back. Make sure there is enough space around the router for ventilation so it does not overheat.
For visible runs, bundle cables with Velcro ties, use a cable sleeve for vertical drops and a low-profile floor cord cover for any cable that must cross a walking route. In rentals, choose adhesive solutions; in owned spaces you can add screwed trays and desk grommets.
One simple rule solves many problems: buy cables in the correct length. A two-metre cable routed cleanly to a nearby outlet creates no excess to manage; a five-metre cable bundled under the desk will always be bulky.
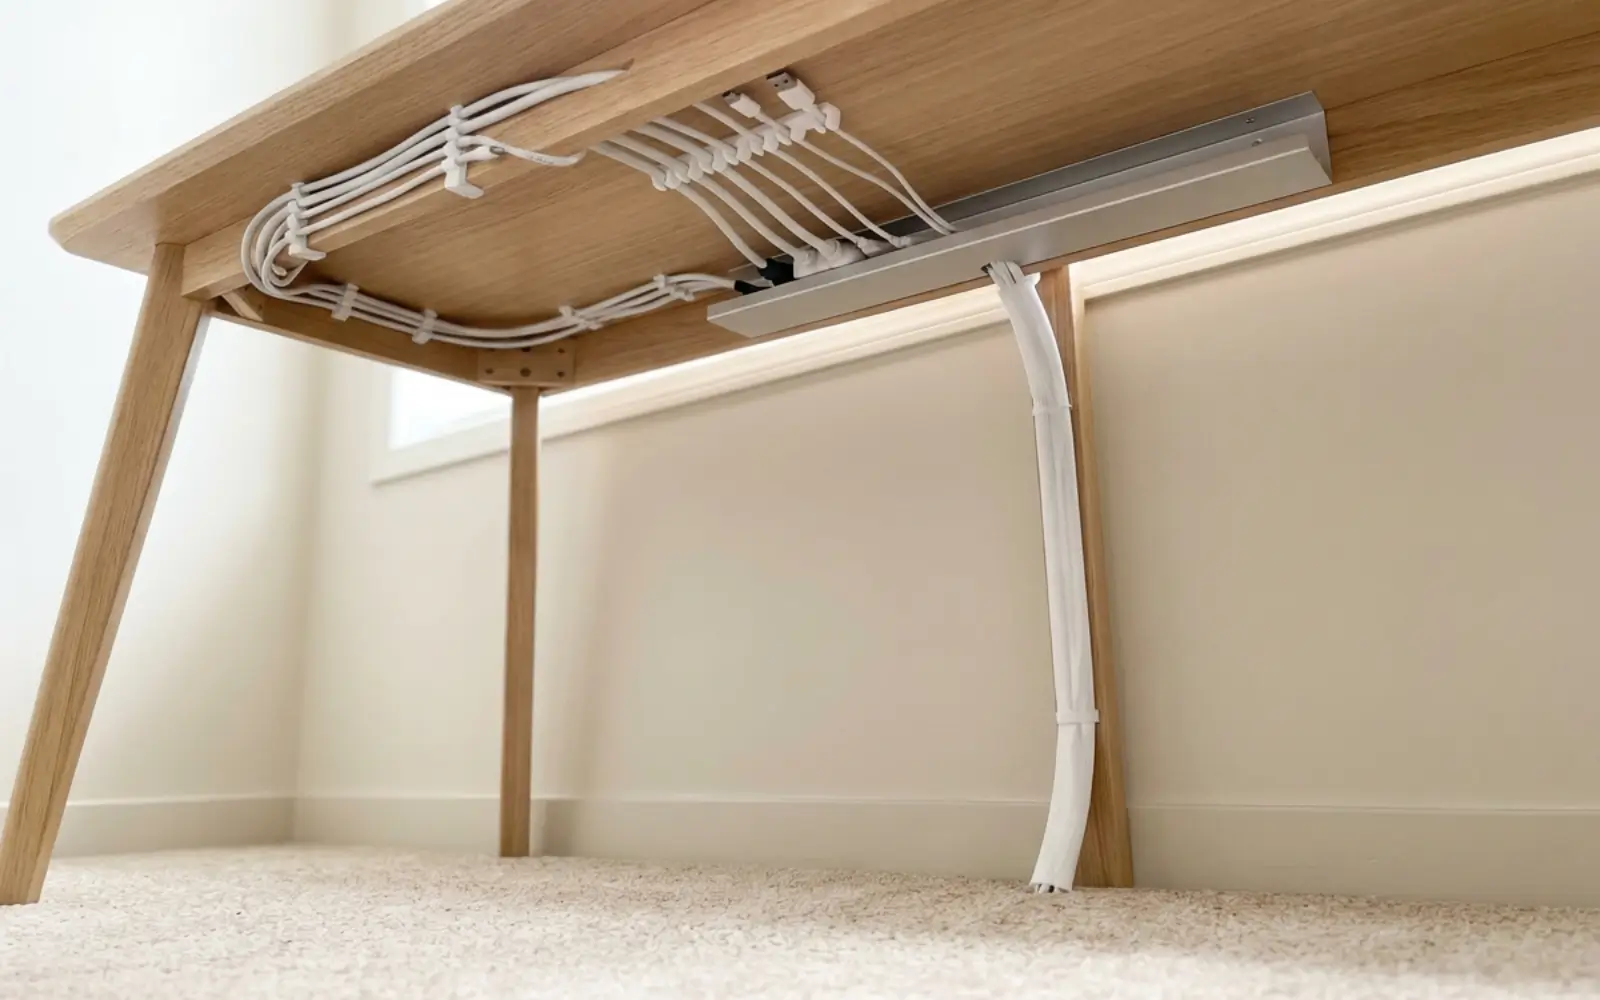
UNDER-DESK ROUTING
Adhesive clips and a slim tray turn cable chaos under the desk into one clean, controlled route.
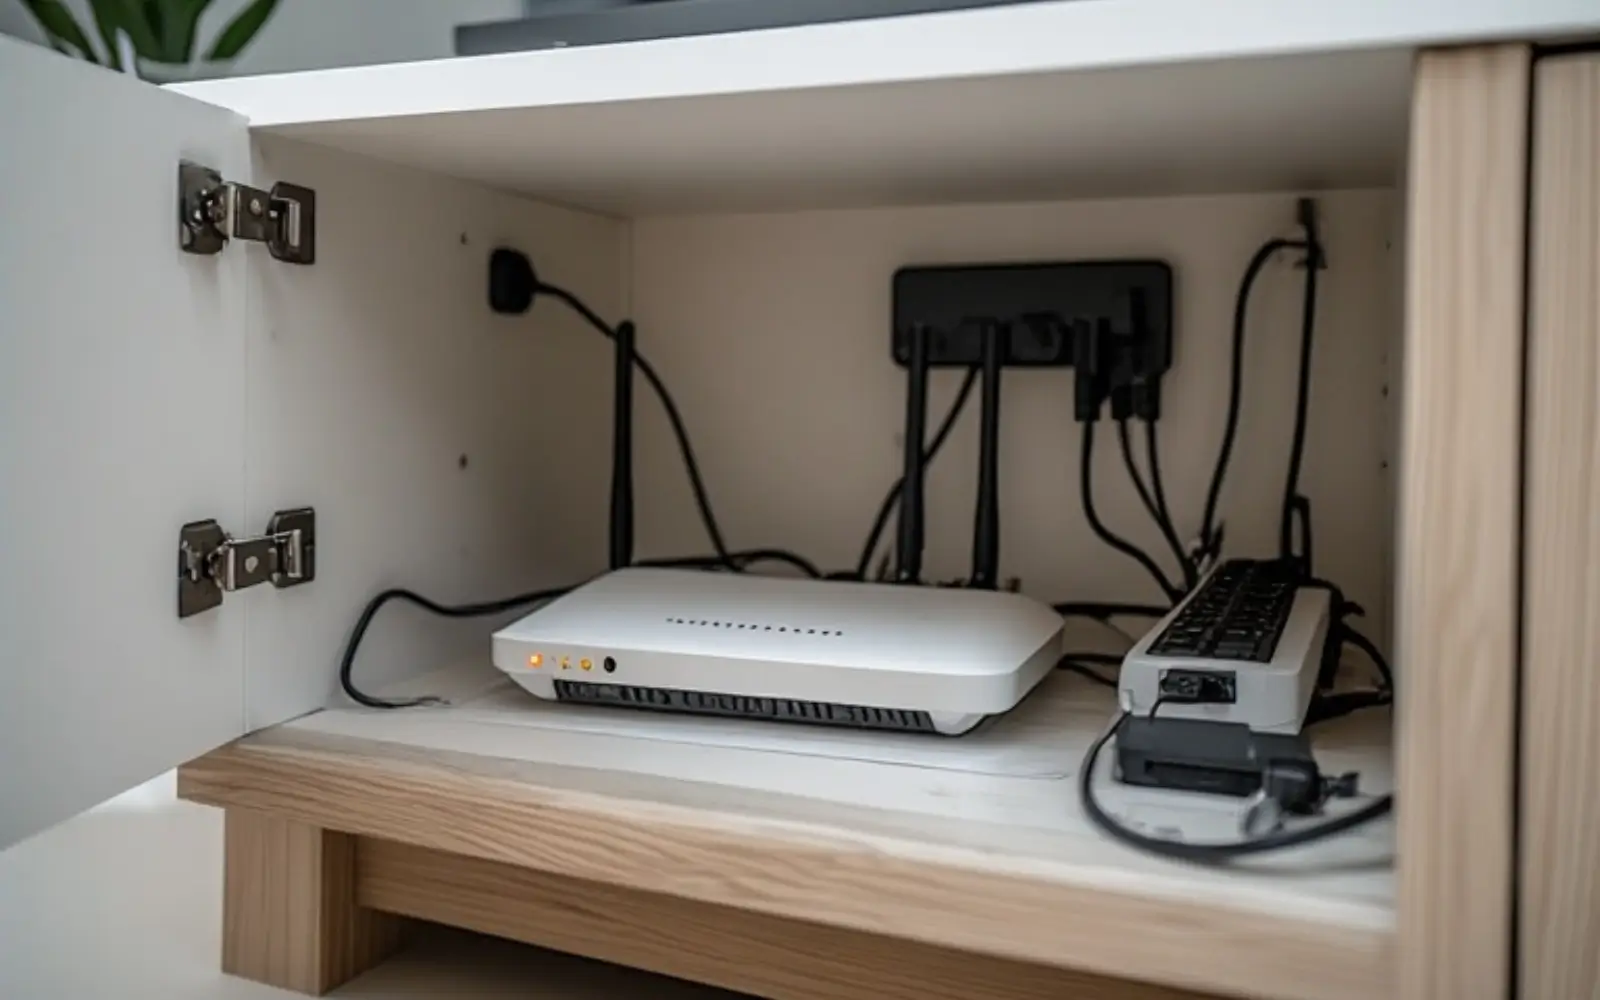
HIDDEN ROUTER
Router and power strip concealed inside a ventilated cabinet, so only one tidy cable run is visible in the room.
Tech that does not fight your palette
Tech is usually designed in black and dark grey, which creates harsh contrast against light desks and walls. In a feminine office, that contrast pulls attention away from everything else.
Prefer white, warm off-white, beige, soft grey or light aluminium for monitors, keyboards, mice and small speakers. Aim for all visible tech to sit in one finish family rather than a mix of black, white and silver.
Split devices into daily tech – laptop or monitor, keyboard, mouse, one set of headphones, one charger – and sometimes tech like external drives, microphones and spare cables. Daily tech can live at the desk. Sometimes tech belongs in a drawer or cabinet and comes out only when needed.
A laptop on a stand looks intentional and brings the screen to eye height; a laptop flat on the desk reads as abandoned. A monitor arm removes the stand footprint, lets you push the screen back when not in use and simplifies cable routing. Keep all desk accessories in one metal finish so the lamp, monitor arm and organisers feel like a set.
NEUTRAL TECH PALETTE
Light, neutral tech that blends into the room instead of fighting your soft feminine palette.
Storage and tech layouts for real apartments
Recipe 1: Living room corner office with no built-in storage
For a dedicated corner in a living room with roughly 120 cm of wall width and no existing storage. The office must feel contained and non-intrusive when you are off the clock.
- Sideboard around 120 cm wide beside the desk – home for router, power strip, files and stationery.
- Slim desk in light wood or white with a laptop on a stand and wireless keyboard and mouse.
- One desk lamp and one plant on the desk; everything else lives inside the sideboard.
- Under-desk clips and tray routing all cables into the sideboard so none are visible on the floor.
LIVING ROOM CORNER
A compact living room office corner where a closed sideboard quietly holds all tech and paperwork out of sight.
Recipe 2: Console desk behind the sofa
For a living room where the sofa floats slightly away from the wall and the desk lives behind it. The desk must clear quickly at the end of the day.
- Console-style desk 30–40 cm deep and 100–140 cm wide behind the sofa.
- Compact ergonomic chair in colours that suit the living room palette.
- Slim two-drawer pedestal at one end for stationery and tech accessories.
- Small lamp and one plant on the console; basket at the end for items that need to be cleared quickly.
- Cable box on the floor behind the console to hide the power strip and chargers.

CONSOLE DESK SETUP
A behind-the-sofa console desk that clears quickly at the end of the day, with cables hidden in a discreet floor box.
Recipe 3: Hallway niche office
Suits a hallway or transition space with a niche at least 50 cm deep and 80–100 cm wide. A wall-mounted desk spans the width, with two floating shelves above and a swing-arm wall lamp or compact pendant providing light.
- Wall-mounted desk surface 50 cm deep or less.
- Two floating shelves above in a finish matching the desk.
- Slim chair or stool that tucks fully under the desk.
- Swing-arm wall lamp or small pendant mounted to one side.
- Matching closed boxes for storage and a single framed print or mirror for depth.
HALLWAY NICHE OFFICE
A hallway niche turned into a complete office, with storage, lighting and cables all contained within the recess.
Recipe 4: Studio apartment one-corner office
Ideal for a 25–35 m² studio where the entire apartment is one room. The office zone occupies a single corner instead of a full wall so it does not dominate the space.
- 90–100 cm desk positioned in the corner, either angled slightly or flush to the walls.
- Ceiling-mounted curtain rod with a linen panel to close off the zone visually in the evening.
- Compact storage unit beside the desk for all overflow.
- Task lamp at desk level for focused work.
- One piece of art or a small shelf arrangement on the corner wall at eye level.
- Chair that rolls easily so it can be repositioned when the zone is "closed".
STUDIO CORNER OFFICE
A one-corner studio office with storage and curtain zoning so work can disappear when the day is over.
Feminine home office decor ideas that still look professional
If the layout, chair height, lighting and storage are already under control, decor is the layer that turns a functional setup into a space that feels elegant and grown-up instead of themed. This section focuses on the visual decisions – colours, textures, materials and objects – that make a feminine home office read as professional on camera and calm in real life.
You will move through mood, colour, desk styling, background wall decisions, soft layers and tech aesthetics before looking at concrete styling recipes, common mistakes and a quick checklist.
Before you decorate: define the mood of your feminine office
Decorating without a defined mood is the design equivalent of cooking without a recipe. You buy ingredients that individually look appealing, but they do not make a coherent dish. In a small apartment office, where every visible element is in close proximity to every other, visual incoherence is especially costly.
A mood gives you a filter. Before you purchase anything, decide on the emotional register of the space: warm or cool, soft or crisp, minimal or layered. That filter then governs every subsequent choice – the finish of the desk, the weight of each textile, the tone of the art and the metal of the hardware.
Four archetypes below cover most feminine home offices. They are not rigid rules; they are starting points. Most spaces land between two of them. The point is to choose a direction and stay consistent.
Soft Neutral Cocoon
This mood is the most versatile and camera-friendly. It is built on warm whites, oatmeal, natural linen and light wood – a palette that photographs warmly, recedes in small rooms and reads as calm and put-together at any hour of the day.
- Colours: warm white, oatmeal, linen, soft ecru, light natural wood.
- Textures: woven linen, cotton canvas, unfinished wood, soft wool.
- Metals: brushed champagne, warm gold, or no metal at all.
- Shapes: rounded, organic, low-profile – no harsh geometric contrast.
Rosy Warm Glow
This mood uses blush, terracotta, warm taupe and camel to feel warm and feminine without tipping into saccharine. On camera, the palette is exceptionally flattering. The risk is oversaturation – it works when one warm tone dominates and the others serve it, not when all compete equally.
- Colours: dusty rose or blush as dominant, terracotta and camel as accents, warm white as base.
- Textures: velvet, boucle, warm-toned ceramics, woven natural fibres.
- Metals: brushed brass, antique gold or aged bronze.
- Shapes: curved and soft – avoid sharp, industrial forms.
Modern Feminine Minimal
This archetype is for a space that reads as feminine through quality and restraint rather than pink or florals. Greige, matte black accents and a tightly edited object count create a quiet, confident room. It photographs with more contrast, which can look sharp and professional if the lighting is warm enough to soften it.
- Colours: warm greige, off-white, soft charcoal, matte black as a deliberate accent only.
- Textures: smooth plaster-effect finishes, clean linen, stone, matte lacquer.
- Metals: brushed gunmetal, polished chrome or matte black.
- Shapes: precise geometric lines, softened by one organic element such as a plant or round vase.
Light Parisian Feminine
This mood borrows from the Parisian apartment aesthetic: cream, herringbone wood tones, aged brass and a relaxed sense of curated living. It is the most layered of the four; it allows more objects and texture but demands discipline to avoid clutter.
- Colours: cream, antique white, soft warm grey, aged oak tones.
- Textures: woven cane, aged linen, smooth leather, patinated metal.
- Metals: aged or brushed brass only – no chrome.
- Shapes: classical and slightly ornate – oval mirrors, curved chair backs, subtle carved details.
Feminine colour palettes that still read as professional
Colour in a feminine office rarely fails because of the shades themselves. Blush, sage, warm white and dusty purple can all be professional. The problem is usually quantity and proportion – too many colours in similar volumes, or colours that are too saturated for a small camera frame.
A simple framework: in a small office zone, use your dominant colour on the largest surfaces (wall, desk, rug), a secondary colour on medium elements (chair, textiles, styled shelves) and an accent colour sparingly on small objects. Three colours in this hierarchy almost always work; four require significant design experience to balance.
Palette 1: Blush + warm white + camel + brushed brass
Warm white takes the walls and desk. Blush appears in the chair upholstery or a single large textile. Camel grounds the space in the rug or an additional textile. Brushed brass ties the hardware together through lamps, frames and small metal objects.
SOFT NEUTRAL OFFICE
Warm white and oatmeal palette, light wood desk and one abstract print – the calm, camera-friendly version of a feminine home office zone.
Palette 2: Dove grey + warm white + dusty rose accents
Dove grey works as a confident base on one wall or as an accent behind the desk, with warm white on the desk and main furniture pieces. Dusty rose only appears in deliberate accents such as a cushion, pen cup or art mat. The result is sophisticated with a soft warmth cold grey alone cannot achieve.
Palette 3: Soft sage + cream + light oak wood
Sage on an accent wall and cream everywhere else, with light oak in the desk and smaller wood accents, creates a calm, composed base that suits small spaces. Warm natural or warm-toned artificial light keeps both sage and cream from feeling flat.
Palette 4: Greige + champagne + muted plum
This palette suits Modern Feminine Minimal setups. Greige dominates walls and desk. Champagne appears in metals and possibly a textile. Muted plum appears once – in a vase, art print or folded throw. One plum item reads as confident; several read as a theme.
Desk and surface styling: feminine, edited, not cluttered
The desktop is the most scrutinised surface in your home office and the one most prone to creeping disorder. Styled well, it communicates that you are organised and in control. Styled poorly, it does the opposite, regardless of how beautiful the individual objects are.
The foundational rule of feminine desk decor is that every visible object must earn its place by being actively functional, aesthetically supportive or both. Anything else belongs in drawers or closed storage.
DESK DECOR CLOSE-UP
Curated feminine desk styling – one hero vase, one pen cup and intentional tech instead of a crowded surface.
Choose accessories that earn their place
Materials determine whether a setup reads as quality or budget. Ceramics, linen or cotton, glass, stone and natural or bleached wood age gracefully and photograph well. Cheap plastics, glitter and novelty pieces rarely do.
A large-format desk mat in linen, muted leather or soft silicone in a neutral tone acts as the rug of the desktop – unifying everything that sits on top and protecting the surface.
One hero object instead of ten trinkets
Choose one clearly decorative object per desk – a sculptural vase, exceptional lamp or small art piece – and let it carry the personality. Ten small decorative items merge into undifferentiated visual noise at camera distance.
Matching hardware ties everything together
All small metal details in the same view – lamp base, frames, pen cup accents, hardware – should share a single finish family. Warm metals (brass, soft gold, champagne) suit Rosy Warm Glow and Light Parisian moods, while cooler metals (silver, chrome, gunmetal) suit Modern Feminine Minimal.
Background wall decor that looks elegant on camera
Your background wall is a professional communication tool, not just personal expression. Colleagues and clients form impressions before you speak. Calm, considered backgrounds say you are organised and thoughtful; busy or heavily themed backgrounds say something else.
The most effective camera backgrounds are also the simplest. You do not need expensive wallpaper or a built-in bookcase – you need one calm surface with a small number of considered elements, edited carefully.
CAMERA BACKGROUND
A single large-format print and two plants styled on a shelf – enough depth for video calls without visual noise.
Art and prints: feminine but not juvenile
Choose art that is legible at video-call distance: abstract compositions in your palette, botanical prints, calm photography or minimal typographic pieces. Avoid neon signs, large quote posters, mixed gallery walls with many small frames and any logo-heavy art.
How many frames and how to arrange them
One large print (around 50 × 70 cm or larger) or two to three medium prints with consistent frames works best. Hang them at a consistent height with equal spacing so the arrangement reads as a deliberate composition rather than a provisional collection.
Shelves, plants and styled objects
Use shelves sparingly. Two or three objects per shelf – repeated materials and colours – feel calm. One or two plants at different heights add life; a jungle of foliage quickly overwhelms a small frame.
Soft layers, tech aesthetics and real-world styling recipes
Textiles, rugs and tech finishes are the quiet elements that make a feminine office feel finished rather than improvised. They also decide whether the workspace integrates with the rest of the room or feels like a separate theme park.
Use one solid base textile, one subtle pattern and, if needed, a single bolder pattern. In bedrooms, link office textiles back to existing bedding; in living rooms, echo sofa and cushion colours so the office zone feels like part of the same story.
For tech, choose finishes that echo the room: white or warm neutrals, slim monitors, keyboards and mice that visually belong. Cable sleeves, trays and colour-matched leads keep the setup intentional rather than improvised.
STUDIO CORNER OFFICE
Sage and blush studio corner where textiles, tech finishes and one piece of art pull the whole room together.
Common feminine home office decor mistakes
- Using too many different pinks and metal finishes in one view so the palette feels chaotic.
- Covering the entire desk with products and decor so no visible workspace remains.
- Combining fairy lights, neon signs and busy wallpaper in the same camera frame.
- Filling the background wall with many small frames that collapse into visual noise on video.
- Leaning on low-quality rugs, cushions and curtains that undermine otherwise good design decisions.
- Buying decor before defining a mood or palette so the space tells several different stories at once.
- Treating every surface as a decorating opportunity instead of deliberately leaving some areas empty.
- Ignoring the floor around the desk – visible power strips, cable bundles and bags left on show.
Explore more small-space ideas
If you want to keep planning your apartment, these guides go deeper into layouts, bedrooms, walls and styles:
- Small Apartments & Studio Decor – zoning, furniture placement and cozy ideas for one-room flats.
- Aesthetic Room & Bedroom Ideas for Small Apartments – layouts, lighting and storage that connect with your office zones.
- Walls, Color & Art – renter-friendly wall ideas behind and around your desk.
- Aesthetic Styles & Vibes – choose the overall mood for your home and office.
Dive deeper into each home office step
Choose the part of your home office you are working on now and jump straight to the archive category that matches it.
Step 1
Layout & zones
Mapping your apartment, testing candidate walls and choosing the best zone for your desk in a small space.
Step 2
Desk setups & essentials
Desks, chairs, lighting and starter kits that turn a corner into a comfortable, feminine workspace.
Step 3
Storage, tech & cables
Sideboards, drawer units and tech setups that hide the mess and keep your office background calm.
Step 4
Decor & backgrounds
Wallpapers, colour palettes and styling recipes that make your office look polished on camera and in person.